


Start with wholesome ingredients like oats, pumpkin puree, and peanut butter. These staples not only provide great taste but also pack in nutritional benefits. My own furry friend goes wild for these flavours, and I love knowing exactly what goes into his snacks.
Combine one cup of pumpkin puree with half a cup of peanut butter and two cups of oats. Mix until you achieve a dough-like consistency. Roll the mixture into small balls or use cookie cutters for fun shapes. I often let my kids help with this part; they enjoy creating different forms, and it turns into a fun family activity.
Preheat the oven to 180 degrees Celsius. Place the formed goodies on a baking sheet lined with parchment paper. Bake for approximately 20 to 25 minutes or until they are golden and firm. The aroma wafting through the house during baking is simply irresistible, and I can’t help but feel the excitement radiating from my pup.
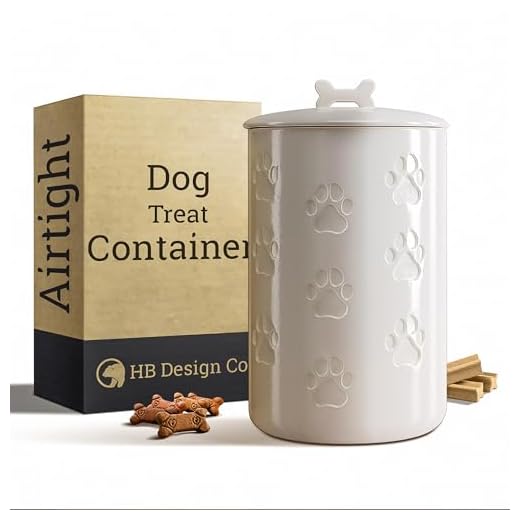
Once cooled, these savoury delights can be stored in an airtight container for up to two weeks. I usually make a batch every couple of weeks and freeze extras for later use. Homemade snacks not only save money, but they also allow me to cater to my pet’s preferences without any hidden additives.

Creating Irresistible Canine Snacks
Start with whole wheat flour as a base. It provides a pleasant texture and is gentle on your furry friend’s stomach. Combine it with finely mashed bananas or pureed pumpkin for natural sweetness. If you want to add a protein boost, consider incorporating peanut butter–ensure it’s free from xylitol, as that’s harmful to pets. Mix these ingredients in a bowl until you achieve a dough-like consistency.
Shaping and Baking
Roll out the dough to about half a centimetre thick. Use cookie cutters for fun shapes or simply slice them into squares. Place the pieces on a baking tray lined with parchment paper. Preheat your oven to 180°C (350°F) and bake for approximately 25-30 minutes until they’re golden brown and firm. Allow them to cool completely before serving. Storing these delights in an airtight container keeps them fresh for weeks, though I doubt they’ll last that long!
Flavour Variations
Experiment with flavours by adding ingredients like shredded carrots, oats, or even blueberries. Each new combination offers a unique taste experience for your pup. Just remember to introduce any new ingredient gradually to monitor for any adverse reactions. With a bit of creativity, every batch can be a delightful surprise for your four-legged companion.
Selecting Safe Ingredients for Your Canine Snacks
Choose whole, natural elements when crafting your canine goodies. Avoid artificial additives and preservatives that can upset your furry friend’s stomach. Stick with familiar items like oats, pumpkin, and peanut butter, ensuring they are free from xylitol, which is toxic to pets.
Keep an eye on the nutritional value of your choices. For instance, pumpkin is rich in fibre and beneficial for digestion, while peanut butter provides protein and healthy fats. Here’s a quick reference table for safe ingredients:
| Ingredient | Benefits | Notes |
|---|---|---|
| Oats | High in fibre, helps with digestion | Use whole grain for best results |
| Pumpkin | Rich in vitamins, good for digestion | Plain canned pumpkin is best |
| Peanut Butter | Protein source, tasty for dogs | Ensure it does not contain xylitol |
| Carrots | Low in calories, high in vitamins | Chop finely for easy mixing |
| Sweet Potatoes | Rich in vitamins, promotes healthy skin | Cook and mash before using |
Introduce new ingredients slowly to avoid digestive issues. Monitor your pet’s reactions after consuming the snacks. If you notice any adverse effects, discontinue use and consult your vet. By selecting safe, wholesome ingredients, you ensure your furry companion enjoys their treats without any worries.
Step-by-Step Guide to Preparing the Dough
Begin with a sturdy mixing bowl. Combine the dry components first: whole wheat flour, rolled oats, and a pinch of salt. This creates a solid foundation. In a separate bowl, whisk together the wet ingredients–eggs and an oil of your choice, like coconut or olive. The oil adds moisture and flavour.
Mixing the Ingredients
Gradually incorporate the wet mixture into the dry ingredients. Use a spatula or your hands to blend until a cohesive dough forms. If the mixture feels too crumbly, a splash of water can help bind it together. Avoid overmixing; a few lumps are fine.
Shaping the Dough
Once you have a smooth dough, transfer it onto a lightly floured surface. Roll it out to about half a centimetre thickness. Use cookie cutters to create shapes that will appeal to your furry friend. If you don’t have cutters, a knife can work just as well for squares or rectangles.
Place the shapes on a baking tray lined with parchment paper. Leave a small gap between each piece to allow for expansion during cooking.
- Preheat your oven to 175°C (350°F).
- Bake for 20–30 minutes until golden brown.
- Allow the snacks to cool completely before serving.
These goodies can be stored in an airtight container for several weeks. Give your pup a taste test and watch their tail wag with delight!
Choosing the Right Baking Temperature and Time
For optimal results, set your oven to 160°C (320°F). This temperature ensures that the goodies cook evenly while retaining moisture and nutrients. A lower temperature helps prevent burning, allowing for a crunchy texture without compromising the flavour.
Timing is just as critical. Bake the goodies for 20 to 30 minutes, checking for doneness at the 20-minute mark. Depending on your oven’s performance, you might need to adjust slightly. Look for a golden-brown colour and a firm texture.
Here’s a quick guide to follow:
- Temperature: 160°C (320°F)
- Initial Bake Time: 20 minutes
- Check for Doneness: 20 to 30 minutes
For different shapes or sizes, adjust the baking time accordingly. Smaller pieces may need less time, while larger ones could require a bit longer. Always trust your instincts and keep an eye on the goodies as they develop in the oven.
Experimentation can lead to discovering the perfect timing for your specific recipe, so don’t hesitate to take notes on your findings. You’ll soon have a reliable method that works for you and your furry companion!
Creative Flavour Combinations for Canine Snacks
Try mixing peanut butter with pumpkin for a rich, nutty taste that most pups adore. The combination not only keeps the texture moist but also packs in nutrients that are great for digestion.
Apple and Cinnamon Delight
Chop up some fresh apples and blend them with a sprinkle of cinnamon. This mix offers a sweet and slightly spicy flavour that dogs find irresistible. Plus, apples are a source of vitamins A and C, which are beneficial for your furry friend.
Carrot and Parsley Fusion
Grate fresh carrots and mix them with finely chopped parsley for a refreshing and crunchy option. This combo is not only tasty but also helps freshen your pet’s breath. The natural sweetness of the carrots balances well with the aromatic parsley.
Another unique pairing is sweet potato and chicken. Cooked sweet potato adds a creamy texture while shredded chicken enhances the savoury profile. Together, they create a wholesome bite that’s perfect for training sessions.
For those searching for balanced nutrition, consider using ingredients suited for your breed, like the best type of dog food for boxers. Tailoring flavours can not only appeal to taste but also cater to specific dietary needs.
Experiment with herbs like rosemary or thyme, which can add an earthy note to any recipe. Just ensure they are safe and appropriate for canine consumption. Your companion will appreciate the variety, and you’ll have fun creating new flavours together!
Storing Homemade Canine Goodies for Freshness
For optimal freshness, keep these delicious morsels in an airtight container. Glass jars or plastic containers with tight-fitting lids work wonders. If you’ve made a large batch, consider using vacuum-sealed bags. This method extends shelf life significantly and prevents moisture from spoiling your tasty creations.
Refrigeration and Freezing Tips
If you want to keep them for longer, refrigerate the goodies. They’ll last up to two weeks in the fridge. For extended storage, freezing is your best option. Lay the treats flat in a single layer on a baking sheet, freeze until solid, then transfer them to a vacuum-sealed bag or a freezer-safe container. They can be stored frozen for up to three months. Just thaw a few at a time for your furry friend to enjoy.
Signs of Spoilage
Check for any changes in smell or texture before serving. If they appear dry, hard, or have an off smell, it’s best to discard them. Keeping an eye on these signs ensures you’re giving your pet only the finest, freshest snacks.
Customising Treats for Dogs with Dietary Restrictions
Focus on tailoring recipes to accommodate specific needs. For pups with gluten intolerance, opt for oat or almond flour instead of wheat. These alternatives are often better tolerated and can provide a tasty base. For those with protein sensitivities, consider using alternative sources like fish or turkey. These ingredients are not only nutritious but can also introduce new flavours to their diet.

Observe any allergies closely. If your furry friend has a known aversion to certain ingredients, like chicken or dairy, make sure to exclude them entirely. Substituting with pumpkin puree can add moisture and flavour while being gentle on their stomach.
Incorporate fruits and vegetables that are safe and beneficial. Carrots, sweet potatoes, and blueberries can be excellent additions, offering both taste and nutrition. Always ensure these additions align with your pet’s dietary restrictions.
Experiment with herbal ingredients. Parsley can freshen breath, while turmeric may provide anti-inflammatory benefits. Just check with a vet to confirm these herbs are suitable for your pup’s specific health conditions.
Consider the size and texture of the goodies. For older dogs or those with dental issues, softer options might be necessary. You can achieve this by slightly reducing baking time or adding more moisture to the mixture.
Keep careful notes of ingredients used in each batch. This practice helps in identifying what works best and what to avoid in future recipes. Adjustments may be needed based on your dog’s preferences and tolerances.
FAQ:
What ingredients do I need to make baked dog treats?
To make baked dog treats, you’ll typically require a few basic ingredients. Commonly used items include whole wheat flour, oats, peanut butter (ensure it’s xylitol-free), eggs, and water. You can also add ingredients like mashed bananas, pumpkin puree, or grated carrots for extra flavour and nutrition. Always check with your vet before introducing new foods to your dog’s diet.
How long should I bake the dog treats for?
The baking time for dog treats can vary depending on the size and thickness of the treats. Generally, you’ll want to bake them at around 180°C (350°F) for about 20 to 30 minutes. It’s a good idea to keep an eye on them towards the end of the baking time to ensure they don’t burn. The treats should be golden brown and firm to the touch when done.
Can I customise the recipe for my dog’s dietary needs?
Absolutely! You can customise the baked dog treats based on your dog’s specific dietary needs. If your dog has allergies, consider substituting traditional flour with alternatives like rice flour or chickpea flour. You can also adjust the recipes to include ingredients that your dog enjoys or that are beneficial for their health, such as sweet potatoes or blueberries. Always consult your vet to ensure the modifications are safe.
How should I store the baked dog treats to keep them fresh?
To keep your baked dog treats fresh, store them in an airtight container at room temperature for up to a week. If you want them to last longer, consider refrigerating them, which can extend their shelf life to about two weeks. For even longer storage, you can freeze the treats. Just make sure to seal them well in a freezer-safe bag or container to prevent freezer burn.


