
In this section, we delve into a creative and cost-effective solution for providing a safe space for our furry friends. The focus is on repurposing common materials to construct a barrier that ensures the well-being and freedom of our beloved pets. This approach not only offers a practical solution but also encourages sustainability by reusing available resources.
Why Choose This Method? Utilizing readily available materials can significantly reduce the cost of setting up a protective area for your pet. Moreover, it taps into the growing trend of DIY projects that enhance our living spaces while being environmentally conscious. This method is particularly appealing to those who enjoy hands-on projects and are looking for innovative ways to solve everyday challenges.
The Essence of DIY Craftsmanship lies in the satisfaction of creating something useful and personal. By engaging in this project, you not only provide a secure environment for your pet but also add a unique touch to your outdoor space. The process involves careful planning and execution, ensuring that the final structure is both sturdy and visually appealing.
Selecting Appropriate Wooden Frames
In this section, we delve into the crucial process of identifying suitable wooden structures for constructing a barrier. It’s essential to understand the characteristics of these materials to ensure durability and safety.
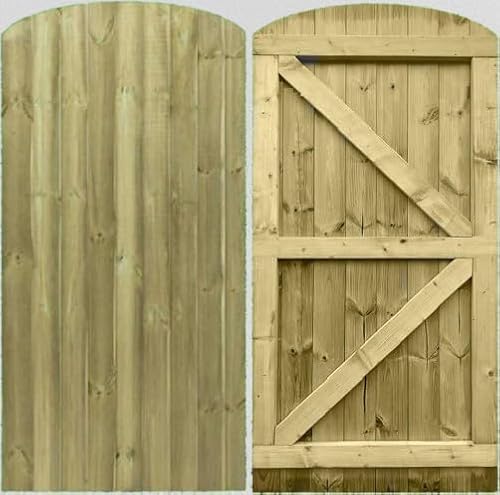
Condition Assessment: Before proceeding, it’s vital to inspect each wooden frame for its overall condition. Look for signs of rot, cracks, or excessive wear. These can compromise the integrity of your barrier. Ideally, choose frames that are sturdy and free from major defects.
Size Considerations: The dimensions of the wooden frames are equally important. Ensure they are uniform and adequate for your needs. This consistency will facilitate a more stable and visually appealing structure.
Treatment and Safety: Be mindful of the treatment applied to these wooden frames. Some may contain chemicals that could be harmful. Opt for untreated or naturally treated options to ensure the safety of your environment and its inhabitants.
By carefully selecting the right wooden frames, you lay a solid foundation for a robust and secure enclosure that serves its purpose effectively.
Preparing the Pallet Wood
In this section, we delve into the essential steps required to ready the wooden components for a robust and secure structure. Ensuring the wood is properly prepared is crucial for the longevity and stability of the final construction.
Before we proceed with assembly, it is imperative to inspect and treat the wooden elements. This process involves several key steps to guarantee the wood is safe and suitable for outdoor use.
| Step | Description | Tools Required |
|---|---|---|
| 1. Inspection | Examine each piece of wood for signs of damage, rot, or infestation. Discard any pieces that are not structurally sound. | Gloves, Eye Protection |
| 2. Cleaning | Remove dirt, old nails, and other debris from the wood. A thorough cleaning ensures better adhesion of any protective coatings. | Hammer, Wire Brush |
| 3. Sanding | Smooth the surfaces of the wood to remove splinters and rough edges. This step also helps in preparing the wood for any paint or sealant. | Sandpaper, Sanding Block |
| 4. Treatment | Apply a suitable wood preservative or sealant to protect the wood from moisture and insects. This step is crucial for outdoor applications. | Paint Brush, Wood Preservative |
Following these steps meticulously will ensure that the wooden components are ready for assembly, enhancing the durability and effectiveness of the structure.
Designing Your Fence Layout
In this section, we will explore the strategic planning involved in setting up a protective barrier around your property. The focus is on creating a secure and visually appealing structure that complements your outdoor space.
Before you begin assembling the components, it’s crucial to map out the area where the barrier will be erected. Consider the dimensions of your yard and the specific zones that require protection. This preliminary step ensures that the structure is both functional and aesthetically pleasing.
To start, measure the perimeter of the area you wish to enclose. This will give you an accurate estimate of the materials needed and help you plan the layout efficiently. It’s also important to consider the height and stability required for your barrier, depending on the terrain and the level of security needed.
Next, sketch a rough layout on paper or use a digital tool to visualize the arrangement of the wooden boards. This design phase is where you can experiment with different patterns and configurations to find the most suitable one for your space. Remember to account for any gates or entry points that need to be incorporated into the design.
Lastly, consider the aesthetic aspects of your barrier. Choose a color scheme or a style that harmonizes with your home and garden. This not only enhances the overall appearance but also ensures that the barrier blends seamlessly into its surroundings.
Assembling the Pallet Fence Sections
In this section, we will delve into the process of putting together the individual components that form the protective barrier for our pet. This step is crucial for ensuring the stability and longevity of the structure.
To begin, gather all necessary materials and tools. This typically includes:
- Pallets in good condition
- Measuring tape
- Hammer and nails
- Saw for cutting pallets to size if necessary
- Drill with appropriate bits
- Screws or bolts for additional strength
Before assembly, ensure each pallet is clean and free from any protruding nails or splinters. Safety is paramount, especially when working with reclaimed materials.
Start by laying out the pallets on a flat surface. Arrange them according to your pre-planned design. This might involve aligning them vertically or horizontally, depending on the desired height and length of the barrier.
Next, secure the pallets together. This can be done by:
- Nailing adjacent pallets together at the corners and along the edges.
- Using screws or bolts for a more secure and durable connection.
- Adding diagonal braces between the pallets to enhance stability.
Ensure that each connection is firm and stable. It’s advisable to have a helper during this process to hold the pallets in place while you secure them.
Once the sections are assembled, inspect each joint and reinforce as necessary. This step is critical to ensure the barrier withstands the test of time and various weather conditions.
Finally, consider adding a top rail or cap to the barrier for additional safety and aesthetic appeal. This can be achieved by attaching a wooden plank along the top edges of the pallets.
With the sections assembled, you are one step closer to completing your pet’s protective enclosure. The next steps involve setting up the barrier in its designated location and ensuring it is securely anchored.
Installing Support Beams
In this section, we will delve into the crucial process of setting up the foundational elements for our enclosure. Proper placement and installation of these components are essential for ensuring the stability and longevity of the structure.
Firstly, select appropriate locations for the support beams. These should be evenly spaced to provide consistent support along the perimeter of the area. Ensure that the ground is level where each beam will be placed to prevent any unevenness in the final structure.
Next, prepare the holes for the beams. Use a post hole digger to create holes that are approximately three times the diameter of the beams and deep enough to secure them firmly. Typically, a depth of one-third the height of the beam above ground is recommended for optimal stability.
Once the holes are prepared, place the beams into them. It’s advisable to have an assistant to help with this step, as aligning and stabilizing the beams can be challenging alone. Ensure that each beam is plumb and securely positioned in the hole.
After the beams are in place, fill the holes with a mixture of soil and concrete to secure them. This not only anchors the beams but also provides additional strength to the structure. Tamp down the mixture firmly to remove any air pockets and ensure a solid base.
Finally, allow the concrete to cure according to the manufacturer’s instructions. This typically takes a few days. During this period, regularly check the alignment of the beams to ensure they remain plumb. Once the concrete has fully cured, the support beams are ready to support the rest of the enclosure structure.
Securing the Structure to Supports
In this section, we will delve into the crucial process of ensuring that our repurposed wooden framework is firmly attached to its supporting elements. This step is vital for the overall stability and longevity of the structure. We’ll explore various methods and materials that can be used to achieve a secure and robust connection.
Choosing the Right Fasteners
Selecting appropriate fasteners is key to the successful attachment of the wooden framework to the supports. Depending on the type of wood and the environmental conditions, different types of fasteners may be more suitable. For instance, galvanized or stainless steel screws are often preferred due to their resistance to rust and corrosion.
Installation Techniques
Proper installation techniques can significantly enhance the security and durability of the connection. It’s important to pre-drill holes for the fasteners to prevent the wood from splitting. Additionally, using a level during installation ensures that the structure is straight and stable.
| Fastener Type | Suitable Wood | Environmental Considerations |
|---|---|---|
| Galvanized Screws | Softwood, Hardwood | High humidity, coastal areas |
| Stainless Steel Screws | All types | Saltwater exposure, extreme weather |
| Decking Nails | Softwood | Moderate climates |
By carefully considering the type of fasteners and employing correct installation methods, we can ensure that our repurposed wooden structure remains secure and functional for years to come.
Finishing Touches and Safety Checks
Upon completing the assembly of our repurposed wooden structure, it is crucial to ensure both aesthetic enhancements and thorough safety inspections are performed. This section will guide you through the final steps to guarantee the durability and appeal of your project, while also prioritizing the well-being of its inhabitants.
Firstly, let’s address the aesthetic aspects. To enhance the visual appeal of your wooden enclosure, consider the following:
- Sanding down any rough edges or splinters to prevent injuries.
- Applying a coat of weather-resistant paint or varnish to protect the wood from the elements and to give it a fresh, new look.
- Adding decorative elements such as plants or hanging baskets to soften the look and blend the structure more harmoniously into your garden landscape.
Next, let’s focus on the safety checks necessary to ensure the integrity of the structure:
- Inspect all joints and connections to ensure they are secure and tight. Reinforce with additional screws or nails if necessary.
- Check the overall stability of the structure by gently pushing and pulling on various sections. Make adjustments as needed to ensure it stands firm.
- Ensure the height and spacing of the wooden slats are appropriate to prevent any potential escape or intrusion.
- Install a secure latch on the entryway to ensure it can be safely closed and opened.
By following these guidelines, you not only enhance the visual appeal of your repurposed wooden enclosure but also ensure its safety and longevity. These finishing touches and safety checks are essential in transforming a simple construction project into a secure and welcoming environment.


