In this section, we delve into the practical aspects of constructing a robust enclosure designed to safely contain our furry friends. The focus here is on creating a durable structure that not only offers protection but also blends seamlessly into the surrounding environment.
Understanding the Essentials: Before we embark on this project, it’s crucial to gather the necessary materials and tools. We’ll be using a versatile mesh fabric, known for its strength and flexibility, which is ideal for crafting barriers that are both functional and aesthetically pleasing. This material is chosen for its ability to withstand the playful antics of our canine companions while ensuring they remain safely within their designated area.
Planning the Layout: The first step in our endeavor involves meticulous planning. We must consider the dimensions of the space, the specific needs of the animals, and the overall design of the enclosure. This thoughtful approach ensures that the final structure not only meets our immediate needs but also stands the test of time.
By the end of this guide, you’ll have the knowledge and confidence to erect a barrier that not only keeps your pets secure but also enhances the visual appeal of your outdoor space. Let’s get started on this rewarding project!
Choosing the Right Materials
In this section, we delve into the essential components required for constructing a secure barrier tailored to the needs of our canine companions. Selecting appropriate materials is crucial for ensuring the durability and effectiveness of the structure.
Understanding the Core Elements
Firstly, consider the framework. A robust support system is paramount. Opt for sturdy posts made from treated wood or durable metal. These will anchor the entire structure, providing stability against various environmental conditions and the physical activity of pets.
Selecting the Mesh
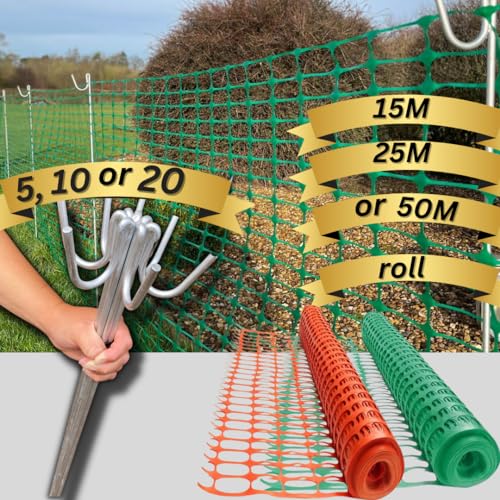
Next, focus on the mesh material. It should be strong yet flexible, capable of withstanding attempts to penetrate or dislodge it. Galvanized steel or a similar rust-resistant material is ideal, ensuring longevity and minimal maintenance. The mesh should also have small enough gaps to prevent paws from getting stuck or bodies from squeezing through.
Preparing the Ground for Installation
In this section, we will delve into the essential steps required to ensure a stable and secure foundation for our protective barrier. Proper ground preparation is crucial not only for the longevity of the structure but also for its effectiveness in containing our pets.
Before we begin the actual assembly of the barrier, it is imperative to assess and prepare the ground where it will be installed. Here are the detailed steps to follow:
-
Inspection of the Area: Walk the perimeter where the barrier will be erected. Look for any uneven surfaces, large rocks, or roots that might interfere with the stability of the posts.
-
Clearing the Area: Remove any debris, such as rocks or sticks, from the area. This ensures a smooth surface for post placement and reduces the risk of the barrier being compromised due to uneven ground.
-
Measurement and Marking: Use a measuring tape to mark the exact locations for each post. This step is critical for maintaining the integrity and uniformity of the barrier.
-
Digging Holes: Depending on the type of soil, you may need to dig holes for the posts. The depth of these holes should be sufficient to anchor the posts firmly, typically about one-third the height of the post above ground.
-
Leveling: After placing the posts in the holes, ensure they are level. This can be done using a spirit level. Proper leveling is essential for the overall strength and appearance of the barrier.
-
Filling and Tamping: Fill the holes around the posts with soil, and tamp it down firmly to eliminate any air pockets. This step helps in securing the posts against lateral movements.
By following these steps meticulously, you will lay a solid foundation for your protective barrier, ensuring it serves its purpose effectively and withstands various environmental conditions.
Constructing the Fence Framework
In this section, I will guide you through the process of erecting the structural support for our containment barrier. This is a crucial step that ensures the stability and longevity of the entire setup.
Gathering Materials
Before we begin, it’s essential to have all necessary materials at hand. This includes sturdy posts, crossbars, and appropriate tools for installation.
- Sturdy wooden or metal posts
- Crossbars for additional support
- Hammer or post driver
- Measuring tape
- Level
Setting Up the Posts
The first step in constructing the framework is to set up the posts. These will serve as the main anchors for our barrier.
- Determine the location for each post, ensuring they are evenly spaced along the perimeter of the area.
- Dig holes approximately two feet deep for each post. This depth ensures stability.
- Place a post in each hole and use a level to ensure it is vertical. Adjust as necessary.
- Fill the holes with soil, packing it tightly around the post to secure it in place.
Once the posts are firmly in place, attach the crossbars between them to provide additional structural integrity. This step is crucial for maintaining the barrier’s shape and preventing sagging over time.
Wrapping the Mesh Around the Frame
In this section, we will delve into the process of securing the protective barrier to the structural framework. This step is crucial for ensuring the integrity and functionality of our enclosure. By carefully attaching the mesh to the frame, we enhance the overall stability and effectiveness of the barrier, making it a reliable solution for our needs.
To begin, ensure that the framework is fully assembled and stable. This provides a solid base for the attachment of the mesh. Lay the mesh out flat beside the frame, ensuring it is free from kinks or damage that could compromise its effectiveness. Starting at one corner of the frame, unroll the mesh along the length, ensuring it is taut and aligned with the frame’s edges.
Using appropriate fastening tools, such as staples or ties, secure the mesh to the frame at regular intervals. It is important to maintain a consistent tension throughout the mesh to prevent sagging or looseness, which could allow unwanted access. Make sure each fastening point is secure but not overly tight, which could cause the mesh to tear.
As you progress around the frame, periodically check the alignment and tension of the mesh. Adjust as necessary to ensure a uniform and secure fit. The goal is to create a seamless integration of the mesh with the frame, enhancing the barrier’s durability and effectiveness.
Once the mesh is fully attached, perform a final inspection. Ensure all fastenings are secure and the mesh is taut without any visible gaps. This meticulous approach to wrapping the mesh around the frame will result in a robust and reliable enclosure that meets our requirements.
Securing and Finishing Touches
In this section, we will focus on the final steps to ensure the stability and aesthetic appeal of our enclosure. These steps are crucial for maintaining the integrity of the structure and enhancing its overall functionality.
First, let’s address the anchoring of the framework. To ensure that the structure remains sturdy, it is essential to firmly secure the posts into the ground. This can be achieved by using a combination of concrete and soil, ensuring each post is deeply embedded and stable. Additionally, reinforcing the corners with extra support can significantly enhance the overall strength of the enclosure.
Next, we move on to the attachment of the mesh. This involves carefully stretching the mesh across the framework, ensuring it is taut and free from any sagging. Use staples or ties to affix the mesh securely to each post and along the horizontal supports. This step is critical as it prevents any potential gaps or weak spots that could compromise the effectiveness of the enclosure.
Finally, consider adding a top rail or cap to the structure. This not only adds a finishing touch aesthetically but also serves as an additional barrier, preventing any attempts to climb or jump over the enclosure. The cap can be made from wood or metal, depending on your preference and the overall design of the enclosure.
| Step | Action | Material |
|---|---|---|
| 1 | Secure posts | Concrete, soil |
| 2 | Attach mesh | Staples, ties |
| 3 | Add top rail/cap | Wood, metal |
By following these steps, you can ensure that your enclosure is not only secure but also visually appealing, providing a safe and comfortable environment for your pets.
FAQ
What materials do I need to build a chicken wire fence for dogs?
To build a chicken wire fence for dogs, you will need several materials including chicken wire, wooden or metal posts, post drivers or hammers, wire cutters, and gloves for safety. Additionally, you might need staples or wire to secure the chicken wire to the posts, and a measuring tape to ensure the fence is the correct size.
Can a chicken wire fence really keep my dog contained?
Yes, a chicken wire fence can effectively contain dogs, especially if they are not prone to digging or jumping high. The fence should be tall enough to prevent jumping and buried a few inches into the ground to deter digging. However, for particularly determined or large dogs, you might need a stronger or taller fence.
How deep should I bury the chicken wire to prevent my dog from digging under the fence?
To prevent dogs from digging under the fence, it is recommended to bury the chicken wire at least 6 to 12 inches deep into the ground. This depth should be sufficient for most dogs. Additionally, bending the buried portion of the wire outward at a 90-degree angle can further discourage digging attempts.
Is it difficult to install a chicken wire fence by myself?
Installing a chicken wire fence can be moderately challenging if you are doing it alone, especially if you are not experienced in DIY projects. However, with careful planning, the right tools, and following step-by-step instructions, it is definitely achievable. It involves setting up posts, stretching the wire, and securing it, which can be physically demanding but straightforward once you get the hang of it.