In this section, we delve into the intricacies of establishing a secure perimeter for our furry friends without the need for visible structures above ground. The focus here is on a method that ensures safety and freedom for pets while maintaining the aesthetic appeal of your landscape. This approach involves a strategic installation process that is both effective and discreet.
Why Consider a Subterranean Solution? Often, traditional fencing options can disrupt the natural beauty of your property or pose challenges in terms of space and local regulations. A subterranean barrier offers a practical alternative, blending seamlessly into the environment while providing the necessary containment for your pet. This guide will walk you through the essential steps to create a reliable system that meets your pet’s needs and respects the visual harmony of your outdoor space.
Understanding the Basics is crucial before embarking on this project. We will explore the materials and tools required, as well as the best practices for installation. By the end of this guide, you will be equipped with the knowledge to implement a robust, invisible barrier that enhances both the safety and the roaming freedom of your beloved canine companion.
Choosing the Right Location
When planning the installation of a subterranean containment system, selecting the appropriate site is crucial. This section will guide you through the essential considerations to ensure the effectiveness and safety of your setup.
Firstly, assess the topography of your property. Look for areas that are relatively flat and free from obstructions such as large rocks or tree roots, which could complicate the installation process. Additionally, consider the natural boundaries of your land, such as hedges or walls, which can complement the functionality of your containment system.
Next, take into account the proximity to neighboring properties. It’s important to respect privacy and avoid any potential disputes. Ensure that the system does not extend beyond your property lines and that it adheres to local regulations regarding boundary encroachments.
Furthermore, evaluate the accessibility of the chosen location. It should be easily reachable for maintenance and adjustments. Avoid areas that are prone to flooding or excessive moisture, as these conditions can degrade the integrity of the system over time.
Lastly, consider the behavioral patterns of your pet. Observe where they naturally tend to roam and choose a location that effectively encompasses these areas. This will enhance the system’s efficiency and ensure a comfortable environment for your pet.
Preparing the Ground for Excavation
In this section, we will delve into the essential steps required to adequately prepare the terrain for a subterranean installation. Proper ground preparation is crucial for ensuring the smooth and efficient execution of the project, as well as for the longevity and effectiveness of the system once installed.
Before commencing with the excavation, it is imperative to assess the soil conditions and clear the area of any obstacles that might impede the process. This involves removing debris, rocks, and vegetation that could potentially interfere with the installation. Additionally, marking the intended path of the subterranean barrier with stakes and string can provide a visual guide and help maintain a straight and consistent line during the excavation process.
| Step | Action | Purpose |
|---|---|---|
| 1 | Assess soil type | To determine the ease of excavation and necessary tools |
| 2 | Clear the area | To remove obstacles and ensure a clear path for excavation |
| 3 | Mark the path | To guide the excavation and maintain a straight line |
| 4 | Check for underground utilities | To avoid damaging existing infrastructure |
| 5 | Plan for drainage | To prevent water accumulation and damage to the system |
Each of these preparatory steps is vital for a successful installation. By meticulously preparing the ground, we can ensure that the excavation process is carried out safely and efficiently, and that the final installation meets all necessary standards for functionality and durability.
Laying the Fence Wire
In this section, we will delve into the process of installing the protective boundary line. This task is crucial for establishing a secure perimeter around your property. By carefully laying the wire, you ensure the integrity and functionality of the system.
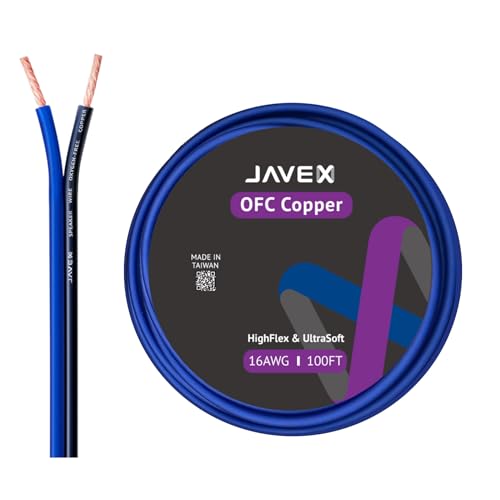
Before we begin, it’s important to gather all necessary tools and materials. These typically include a spool of wire, stakes, a trenching tool, and connectors. Ensure the area is clear of any obstacles that might hinder the installation process.
- Start by marking the desired perimeter with flags or markers. This visual guide will help you maintain a straight and consistent line.
- Next, use the trenching tool to create a shallow groove along the marked path. The depth should be sufficient to bury the wire without it being easily disturbed.
- Unroll the wire along the trench, ensuring it is taut but not overly stretched. This balance is crucial for the system’s effectiveness.
- Secure the wire at intervals using stakes. These will keep the wire in place while you continue to lay it out.
- Once the wire is fully laid out, carefully cover it with the soil removed during trenching. Ensure the wire is completely covered to prevent any potential damage or disconnection.
- Finally, connect the wire to the control unit according to the manufacturer’s instructions. This step completes the installation and activates the protective system.
By following these steps, you ensure a smooth and effective installation of the boundary wire. This setup not only enhances the safety of your surroundings but also provides a reliable containment solution.
Finalizing Installation and Testing
In this section, we will focus on the concluding steps of setting up our containment system and ensuring its functionality. This phase is crucial for guaranteeing the system’s effectiveness and safety for all involved.
Preparing for Activation
Before we activate the containment system, it is essential to double-check all connections and components. Ensure that the transmitter is securely mounted and connected to a power source. Verify that all boundary wires are correctly placed and undamaged. This step helps prevent any malfunctions or interruptions in the system’s operation.
Initial Testing
To begin testing, activate the system and observe the signal indicators on the control panel. Walk the perimeter of the containment area, ensuring that the signal is consistent and strong throughout. This process helps identify any weak spots or gaps in the coverage that might need adjustment.
Training the Companion Animal
Once the system is operational, it’s time to introduce the companion animal to the new boundaries. Use positive reinforcement techniques to help them understand the limits of their new environment. This might involve using flags as visual markers and rewarding the animal for staying within the designated area.
Final Adjustments and Monitoring
After the initial training period, monitor the animal’s behavior closely. Make any necessary adjustments to the system’s settings to ensure a comfortable and effective containment experience. Regularly check the system for any signs of wear or damage, and address these promptly to maintain the system’s integrity.
By following these final steps, we can ensure that our containment system is not only effective but also safe and comfortable for our companion animal.
FAQ
What tools are necessary for digging an underground dog fence?
To dig an underground dog fence, you’ll need several tools including a shovel or trenching tool to dig the trench, a measuring tape to ensure the correct depth and distance, a level to keep the trench straight, and possibly a wheelbarrow to remove excess soil. Additionally, a cable or wire installation tool may be necessary to secure the fence wire in the trench.
How deep should the trench be for an underground dog fence?
The trench for an underground dog fence typically needs to be about 3 to 6 inches deep. This depth is sufficient to prevent the dog from digging under the fence and to protect the wire from damage. However, always check the manufacturer’s instructions for specific recommendations as different systems may have varying requirements.
Can I install an underground dog fence myself, or should I hire a professional?
Installing an underground dog fence can often be a DIY project if you are handy and have basic knowledge of tools and wiring. The process involves digging a trench, laying the wire, and connecting it to the transmitter. However, if you are not confident in your ability to handle these tasks or if you have a complex yard layout, it might be beneficial to hire a professional. Professionals can ensure the system is installed correctly and safely, which is crucial for its effectiveness and your dog’s safety.


