


For anyone who enjoys outdoor adventures with their furry friend, having a portable solution for snacks is a game-changer. A simple fabric holder can keep those delicious morsels close at hand, ensuring your companion stays motivated and happy during training sessions or walks. With just a few materials and some basic sewing skills, you can create a practical accessory that will make outings with your pet much more enjoyable.
Begin with a sturdy yet lightweight fabric, ideally something that can withstand the elements. Consider using a vibrant cotton or a durable nylon that’s easy to clean. Cut two identical pieces of fabric in a size that fits your needs–around 20 cm by 15 cm is a good starting point. This will form the body of your accessory, while a drawstring closure will keep the snacks secure.
Next, sew the edges of the fabric pieces together, leaving the top open for your drawstring. A simple straight stitch will suffice, but if you’re feeling adventurous, a zigzag stitch can add a decorative touch. Once the sides are sewn, fold down the top edge to create a casing for the drawstring. Insert a cord or ribbon through this casing, securing it at both ends to make it easy to open and close.
Finish off by adding a belt clip or loop, allowing you to attach the carrier to your waistband or bag. This feature ensures that your snack holder is always within reach, making training sessions seamless and enjoyable. With your new canine snack carrier complete, you’ll be ready for any adventure with your loyal companion by your side.
Crafting a Convenient Companion Carrier
Start with a sturdy fabric, like canvas or denim, for durability. Cut a rectangle measuring approximately 30×20 cm. This size provides ample space without being bulky.
Fold the fabric in half, right sides together, and sew along the sides, leaving the top open. Use a sewing machine for a clean finish, or hand stitch if you prefer. Reinforce the seams to withstand wear and tear from frequent usage.
For a closure, consider adding a drawstring. Cut a piece of cord about 1 metre long, then create a channel at the top by folding down the fabric and sewing a straight line. This will allow the cord to slide through easily. Once threaded, secure the ends to prevent slipping.
Adding a clip or belt loop on the back can enhance convenience. Simply attach a sturdy clip or loop to the top seam, ensuring it’s reinforced for stability. This allows for easy attachment to your belt or bag.
To add a personal touch, decorate with fabric paint or patches. This not only makes your carrier unique but also adds character. Choose designs that reflect your personality or your pet’s traits.
For additional functionality, consider incorporating a small pocket on the front for essentials like waste bags or keys. Cut a smaller rectangle, sew it onto the front before sewing the sides, and ensure it’s securely attached.
Test the finished product by loading it with treats and ensuring it’s comfortable to carry. Adjust the drawstring and strap as needed for optimal usability. This simple project can enhance outings with your furry friend, making adventures more enjoyable.
Choosing the Right Material for Your Pouch
Opt for durable fabrics such as ripstop nylon or canvas. These materials withstand wear and tear from daily activities, ensuring longevity. I once crafted a bag from lightweight cotton, but it frayed after only a few weeks. Sturdiness is key.
Water Resistance
Consider materials that repel moisture. Waterproof fabrics like nylon or treated polyester will keep goodies safe from spills or rain. I learned this the hard way; my first pouch soaked through at a park during a downpour, ruining the snacks inside.
Ease of Cleaning
Choose fabrics that are machine washable or easy to wipe clean. My initial attempt using a non-washable material turned into a smelly disaster after just a couple of outings. Look for options that can handle the inevitable messes.
| Material | Durability | Water Resistance | Ease of Cleaning |
|---|---|---|---|
| Ripstop Nylon | High | Yes | Machine washable |
| Canvas | Medium | No | Machine washable |
| Waterproof Polyester | High | Yes | Wipe clean |
| Cotton (non-treated) | Low | No | Machine washable |
Think about the overall weight of the fabric as well. A lighter option might be convenient for carrying, but it could sacrifice durability. My lightweight version tore easily, which was frustrating during our hikes. Balance is crucial.
Measuring and Cutting Fabric for the Perfect Fit
For an ideal size, start by measuring your desired dimensions. I recommend a width of around 10 inches and a height of 8 inches, but adjust according to your needs. Use a fabric measuring tape for accuracy, ensuring you keep the tape taut while measuring. Once you have your dimensions, add an extra 1 inch to each side for seam allowances.
Cutting Techniques
Use sharp fabric scissors or a rotary cutter for clean edges. Lay your material flat on a cutting mat, then mark your measurements with fabric chalk or a disappearing ink pen. Cut carefully along the lines, ensuring you don’t shift the fabric while cutting. If you’re making multiple pouches, stacking layers can save time, just be careful to cut through all layers evenly.
Fabric Preparation
Before sewing, it’s advisable to pre-wash your fabric to prevent any shrinkage later. Iron the fabric to remove wrinkles, as this will assist in achieving precise cuts. If you’re using a fabric that frays easily, consider applying a fray check solution to the edges. This will ensure durability, especially when filled with goodies for your pet or when you’re out and about.
For additional convenience during outings, consider pairing your creation with best lightweight dog food, ensuring your furry friend stays well-fed on your adventures together.
Sewing Techniques for a Durable Canine Snack Carrier
For a robust and reliable companion accessory, focus on reinforced seams. Use a zigzag stitch along the edges to prevent fraying and enhance durability. This method also provides a bit of stretch, accommodating the wear and tear of daily use.
Double Stitching for Extra Strength
Implement double stitching where stress is likely to occur, particularly at the opening and any attachment points. This technique ensures that your creation can withstand pulls and tugs, especially during training sessions. Always backstitch at the beginning and end of your seams to lock them in place securely.
Finishing Edges
Consider using bias tape or overlocking to finish raw edges, preventing fraying and giving your item a polished look. This not only enhances aesthetics but also adds longevity, making it resistant to daily wear. If you don’t have an overlocker, a simple straight stitch with pinking shears can help reduce fraying.
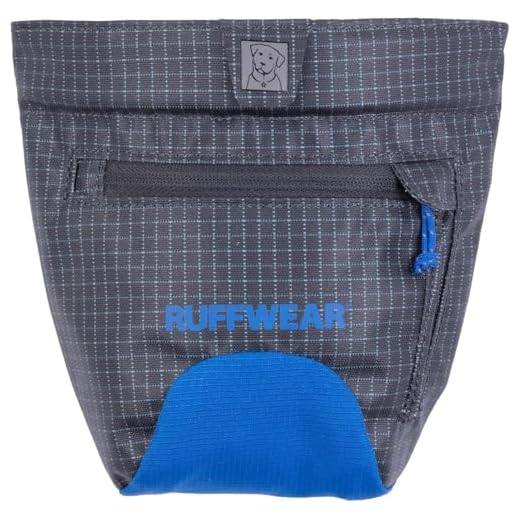
Adding Functional Features: Closure Options and Belt Loops
For a secure and practical companion for your furry friend, consider incorporating various closure mechanisms. Velcro is an excellent choice for quick access, allowing you to grab a reward swiftly while still being secure enough to prevent accidental openings. If you prefer a more traditional approach, snap buttons can provide a reliable closure that adds a touch of style. Zippers offer a sleek option, ensuring that contents remain safe and sound, but they may require a bit more sewing skill.
When it comes to belt loops, integrating them into your design is a game changer. A sturdy loop allows you to attach the bag directly to your waistband or belt, keeping it within easy reach during walks or training sessions. Measure the width of your chosen belt to ensure a snug fit. Reinforcing the fabric around the loop area is wise, as this will withstand the tugging and pulling that comes with active outings. Consider adding an adjustable strap for versatility, allowing you to customise the height and comfort level while on the go.
Always test your closures and loops before the first outing. This way, you can ensure they function as intended, providing both convenience and reliability during your adventures with your four-legged companion.
Customising Your Pouch with Personal Touches and Decorations
Start with fabric paint to add your unique designs. Choose colours that resonate with your personality or match your furry friend’s coat. A simple paw print or heart can make a pouch feel special. Ensure the paint is fabric-safe to withstand wear and tear.

Embellishments and Accessories
Consider adding patches or embroidery. You can sew on a favourite quote about pets, or even your dog’s name. Use iron-on patches for a quick fix or hand-stitch for a personal touch. Beads or sequins can also add some flair, but ensure they are securely attached to avoid choking hazards.
Functional Yet Stylish Features
- Reflective Strips: Adding these increases visibility during evening walks.
- Customised Zippers: Opt for zippers in fun shapes or colours that suit your style.
- Interior Pockets: Create small sections for storing keys or bags while keeping everything organised.
Incorporate a wrist strap or clip that matches the overall design. This not only enhances usability but also adds another decorative element. Choose fabrics that are durable yet stylish, ensuring your creation stands out while remaining functional.
Personalising your accessory transforms it from a simple storage solution into a statement piece that reflects your bond with your canine companion. Enjoy the process of customization, and let your creativity shine!


