


Start with high-quality pork for a flavour that will have your furry friend wagging their tail in delight. Choose thick-cut strips to ensure a rich taste throughout the preparation process. For a delightful aroma, bake these morsels slowly in the oven; low heat allows the meat to crispen perfectly while filling your home with an irresistible scent.
Combine the meat with wholesome ingredients like whole wheat flour and eggs, which provide structure and nutrition. A splash of chicken broth can enhance the flavour profile, making the final product even more enticing. Ensure everything is mixed thoroughly to achieve a consistent dough that’s easy to work with.
Roll out the mixture and cut it into fun shapes using cookie cutters. Opt for bone shapes or simple squares–whatever brings a smile to your face while preparing them. Bake until golden brown, then let them cool completely before serving. These homemade delights not only satisfy your pet’s taste buds but also offer peace of mind regarding what goes into their snacks.

Store the finished goodies in an airtight container to maintain freshness. Watching your canine companion relish these handmade delights will surely warm your heart. Experiment with flavours and ingredients, adjusting based on your pet’s preferences, and enjoy this rewarding process together!
Choosing the Right Ingredients for Bacon Dog Treats
Prioritise quality by selecting fresh, organic components. When preparing these goodies, opt for high-quality meats without preservatives or additives. Look for options like turkey or chicken that provide lean protein alongside the bacon for a balanced snack. Always check labels; ingredients should be straightforward and recognisable.
Fats and Flavours
Incorporate healthy fats, such as coconut oil or peanut butter, which not only enhance flavour but also contribute to a shiny coat. Ensure the peanut butter is xylitol-free, as this sweetener is toxic to canines. For an extra boost of taste, consider adding pureed pumpkin or mashed sweet potatoes; these ingredients are nutritious and appealing to furry friends.
Grain Choices
For the base, select whole grains or grain alternatives. Oats and brown rice make excellent choices, offering fibre and energy. If your pet has sensitivities, consider using gluten-free flours like chickpea or almond flour. Finding the right balance between ingredients can also complement your pet’s regular diet; for instance, pairing with the best dry dog food for australian cattle dog ensures they receive well-rounded nutrition.
Step-by-Step Guide to Preparing Bacon for Treats
Begin with selecting high-quality strips from a reputable source. Look for options with a good balance of meat and fat; this ensures flavour and moisture in the final product.
Preheat your oven to 190°C (375°F). While it’s heating, lay the strips on a baking tray lined with parchment paper. Ensure they are evenly spaced to promote uniform cooking.
Cook for approximately 15-20 minutes, flipping halfway through. Watch closely; you want them crispy but not burnt. The aroma during this process is incredible, and it’s hard not to be excited about the outcome.
Once crisped to perfection, remove the strips from the oven and let them cool on a wire rack. This helps retain their crunch. Avoid placing them directly on paper towels, as that can make them soggy.
After cooling, chop the crispy pieces into small, manageable bits. The size should cater to your furry friend’s chewing ability. If your companion is on the smaller side, aim for tiny morsels.
Store any unused portions in an airtight container in the fridge. They should last for about a week, but I recommend using them sooner for maximum freshness. The leftover bits can easily be integrated into other recipes or enjoyed as a snack.
Mixing and Shaping the Dough
Combine all dry ingredients first. In a large bowl, mix flour, oats, and any other dry components thoroughly. This ensures an even distribution of flavours. Next, add the wet ingredients, including the chopped bits of pork, and mix until a dough forms. Use your hands if necessary; it’s often the best way to gauge the consistency.
Achieving the Right Consistency
The dough should be firm but pliable. If it feels too dry, incorporate a splash of water or broth. If it’s too sticky, sprinkle in a bit more flour. It’s crucial to reach a texture that holds its shape when moulded.
Shaping Techniques
Once the dough is ready, roll it out on a floured surface to about 1/4 inch thick. You can use cookie cutters for fun shapes or simply cut it into squares or strips with a knife. For uniformity, a rolling pin and a ruler can help maintain consistent thickness. Line a baking tray with parchment paper to prevent sticking.
After cutting, place the pieces on the tray, ensuring there’s space between them for expansion during baking. If you want to add an extra touch, use a fork to create patterns on the surface. This not only looks appealing but can also help with even cooking.
Once shaped, it’s time for the oven. Preheat it to the appropriate temperature and ensure each piece is ready for its turn. The scent alone will be a reward for all your efforts!
Baking Techniques for Perfect Bacon Dog Treats
For achieving that ideal crunch and flavour, preheat the oven to a steady 180°C (350°F). This temperature ensures that the goodies turn golden without becoming overly dry.
Use parchment paper on your baking tray. This simple step prevents sticking and aids in even baking. A light greasing of the paper can further enhance the outcome, giving a nice finish to the bottom of the goodies.
Opt for a uniform thickness when rolling out the dough, ideally around 1cm. This consistency guarantees even cooking; thinner edges might crisp up too quickly, while thicker bits may remain soft.
Keep an eye on the clock. Bake for 20 to 25 minutes, checking for a golden hue. If unsure, a toothpick test can help; it should come out clean. Allow the snacks to cool completely before letting your furry friend indulge.
For extra texture, consider giving the treats a quick broil for the last couple of minutes. This will enhance the surface crunch, making them even more appealing to your pet.
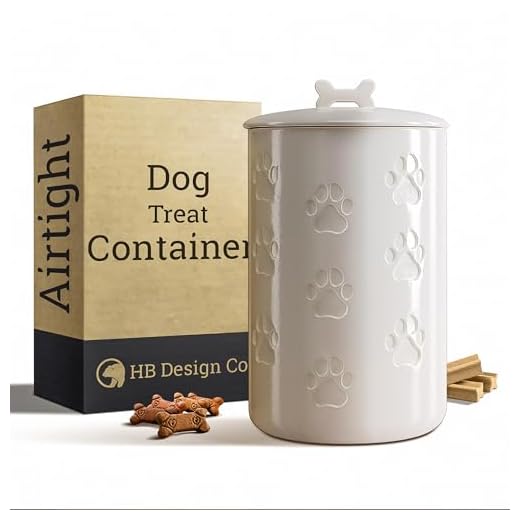
Storing the goodies properly is just as important. Use an airtight container once they have cooled down. This keeps them fresh for longer, allowing your pup to enjoy them over time.
Experiment with different baking sheets. A dark non-stick sheet may cook the bottoms faster, while a lighter one can provide a more even bake. Each oven behaves differently, so keep notes on what works best for future batches.
Lastly, patience is key. Allow the snacks to sit for a day after baking; this resting period enhances the flavours and gives a more robust taste that your four-legged companion will love.
Storing and Preserving Your Homemade Goodies
For optimal freshness, keep your creations in an airtight container. This prevents moisture and air from compromising their texture and taste. I usually opt for glass jars, as they seal tightly and allow me to see the contents.
Refrigeration and Freezing
Storing in the fridge can extend their shelf life up to two weeks. If you want to save them for longer, freezing is a fantastic option. Here’s how:
- Allow the goodies to cool completely.
- Place them in a single layer on a baking sheet and freeze until solid.
- Transfer the chilled pieces into a zip-lock bag, removing as much air as possible.
- Label the bag with the date and type for easy identification.
Frozen snacks can last up to three months. Just thaw them in the fridge before serving, and they’ll be ready to delight your furry friend.
Monitoring for Freshness
Keep an eye out for signs of spoilage. If you notice any changes in smell or appearance, it’s best to discard them. Regularly check your storage containers to ensure they remain dry and clean.
- Check for any mould or unusual textures.
- Smell for any off-putting odours.
- Inspect the container for leaks or cracks.
With these tips, your homemade snacks will stay tasty and safe for your pup to enjoy!


