


If you’re eager to provide your furry friend with a wholesome snack, look no further than dehydrated root vegetables. These chewy morsels offer a nutritious alternative to commercial options, packed with vitamins while being free from preservatives and additives. The preparation is straightforward and rewarding, both for you and your pet.
Begin by selecting high-quality tubers, ensuring they are fresh and free from blemishes. After thorough washing, slice them into even pieces to guarantee uniform drying. A mandoline slicer can be handy here, creating uniform thickness that aids in consistent dehydration. Aim for slices around 0.5 cm thick–this thickness strikes a balance between chewiness and crunch.
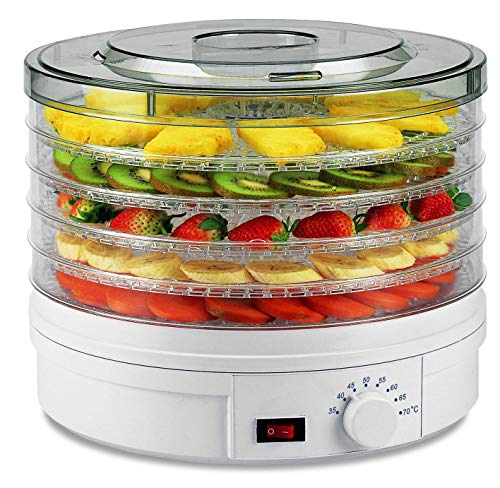
Once sliced, arrange the pieces in your appliance, ensuring adequate airflow for optimal results. Set the temperature to around 60 degrees Celsius for several hours, depending on the moisture content of the vegetables. Keep an eye on the progress; the goal is to achieve a leathery texture without any remaining moisture. Once done, allow them to cool before storing in an airtight container to maintain freshness.

These homemade delights not only satisfy your pet’s taste buds but also contribute to their overall well-being. Incorporating variety into their diet promotes health, and creating these snacks can become a fun bonding experience. Enjoy the process of crafting nutritious bites for your loyal companion!
Creating Dehydrated Delicacies for Your Canine Companion
Begin by selecting firm, healthy tubers. Wash them thoroughly to remove any dirt or pesticides. Slice them into even, thin discs or strips, about 0.5 cm thick to ensure uniform drying. This thickness allows them to dehydrate correctly without becoming too hard.
Next, preheat your machine to approximately 60°C (140°F). While waiting for it to reach the desired temperature, arrange the sliced pieces on the trays in a single layer, ensuring they do not overlap. This spacing promotes proper airflow, allowing moisture to escape efficiently.
Once your appliance is ready, place the trays inside and set the timer for around 4 to 6 hours. The exact duration may vary based on your appliance and the thickness of the slices. Keep an eye on the progress; they should become crunchy but not brittle. A good indicator of doneness is a slightly leathery texture; they should bend without breaking.
After removing the slices, let them cool completely before storing them. Place the cooled pieces in an airtight container to maintain their freshness. These chewy snacks can last for several weeks, making them an excellent option for rewarding your furry friend during training or just as a tasty surprise.
Experimenting with different slicing techniques or even combining flavours with a bit of cinnamon or turmeric can add a unique twist. Keep track of what your pet enjoys the most, as customisation can lead to delightful discoveries.
Selecting the Right Tubers for Your Canine Snacks
Opt for medium-sized, firm specimens. Look for those with smooth skin, free from blemishes or soft spots. Ripe varieties should have a rich colour, indicating high nutrient content. I usually avoid any that seem overly large or small, as they can vary in texture and sweetness.
Consider the variety as well. Orange-fleshed types tend to be sweeter and are often preferred by pets. However, the purple and white varieties can also be nutritious and add a different flavour profile. I’ve found that my furry friend enjoys the orange ones the most, but experimenting can lead to delightful surprises.
When purchasing, check for freshness. Squeeze the tubers gently; they should feel solid without any give. If you’re at a farmer’s market, don’t hesitate to ask about their growing methods or how long they’ve been stored. Freshness impacts the final product significantly.
| Type | Colour | Sweetness | Texture |
|---|---|---|---|
| Orange Flesh | Bright Orange | High | Creamy |
| Purple Flesh | Deep Purple | Moderate | Slightly Dense |
| White Flesh | Off-White | Low | Starchy |
After selection, store them in a cool, dark place. Exposure to light can lead to sprouting, which affects flavour. Always wash them thoroughly to remove any pesticides or dirt before preparation. A little care in choosing and handling these ingredients can make a big difference in the final snacks.
Preparing Sweet Potatoes for Dehydration
Start by washing the tubers thoroughly to remove any dirt or pesticides. Using organic varieties can eliminate concerns about chemicals. After cleaning, peel the skin off. Some prefer leaving the skin for added nutrients, but I like the texture better without it.
Next, cut the root into uniform pieces. Thin slices, about 1/4 inch thick, dehydrate more evenly and quickly. You can also experiment with different shapes, such as cubes or sticks, depending on what you think your furry friend will enjoy most.
Soaking the slices in a solution of water and lemon juice can enhance flavour and prevent browning. A ratio of one tablespoon of lemon juice to a cup of water works well. Soak for about 10 minutes, then drain and pat dry using a clean towel.
Before placing the pieces in the machine, arrange them in a single layer on the trays. Avoid overlapping to ensure proper airflow and even drying. Setting the temperature to around 60°C (140°F) is ideal for preserving nutrients while achieving that crunchy texture.
Dehydration typically takes 6 to 12 hours, depending on thickness and moisture content. Keep an eye on them towards the end to prevent over-drying. Once done, allow the pieces to cool completely before storing them in an airtight container. This process not only preserves the flavour but also makes them an ideal snack anytime.
Setting Up Your Dehydrator for Optimal Results
Prior to starting, ensure the appliance is clean. A quick wash with warm, soapy water and a thorough rinse will prevent any unwanted flavours from affecting the final product.
Temperature plays a significant role in the dehydration process. Set the machine to around 60°C (140°F) for optimal results. This temperature helps preserve nutrients while effectively removing moisture.
Arrange slices evenly on the trays, allowing ample space between them. Overlapping can lead to uneven drying, so aim for a single layer. If you’re using multiple trays, rotate them halfway through the process to promote uniformity.
Timing is another critical element. Depending on the thickness of your slices, dehydration can take anywhere from 6 to 12 hours. Check progress periodically. The pieces should be firm yet slightly pliable when finished–too brittle indicates over-drying.
- Check moisture content regularly to avoid over-drying.
- Utilise a food thermometer to ensure the right temperature is maintained.
- Keep the dehydrator in a well-ventilated area to allow airflow.
Finally, once the process is complete, let the goodies cool before storing. This will help maintain their texture and flavour. Store in an airtight container in a cool, dark place for longevity.
Monitoring Dehydration Process and Texture Checking
Check the consistency of your creation periodically during the drying phase. Aim for a texture that’s firm yet slightly pliable. Here’s how to effectively monitor the progress:
- Set a timer for every hour. This allows you to stay on track without constantly hovering over the machine.
- Open the dehydrator carefully to avoid heat loss. A quick visual inspection can provide insights into how the process is unfolding.
- Use tongs to pick a piece and examine it by bending slightly. If it breaks easily, it needs more time. If it bends without snapping, you’re on the right path.
Keep a close eye on the colour change. Ideally, they should take on a darker, more concentrated hue. This indicates the removal of moisture and enhancement of flavour.

- After a few hours, take a small sample and let it cool. Cooling can change the texture slightly.
- Test the crunchiness. A well-dehydrated piece will snap when bitten but should not crumble into dust.
- Store any samples in an airtight container to see how they fare over a couple of days. This helps determine if further dehydration is necessary.
Ensure to document the time taken for each batch. This information will be invaluable for future attempts, allowing for adjustments based on your preferences and your furry friend’s tastes.
Storing and Serving Dehydrated Sweet Potato Treats
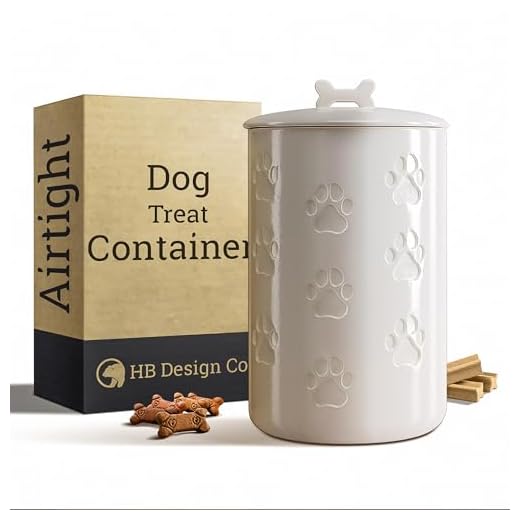
After creating those delicious snacks, proper storage is key to maintaining their quality. Store your dehydrated goodies in an airtight container, preferably glass or BPA-free plastic, to keep moisture at bay. A cool, dark place like a pantry or cupboard is ideal. If you live in a humid environment, consider refrigerating them to prolong freshness.
For optimal texture and flavour, serve these delights at room temperature. Always offer a small piece first to assess your furry friend’s reaction. If you’re considering a longer-term option, vacuum sealing can keep them fresh for several months, while maintaining that crunchy texture your pup loves.
When introducing these snacks into your dog’s diet, it’s wise to consider portion sizes and frequency. Consult your vet if unsure, especially if your companion follows a specific dietary plan. If you’re looking to pair these snacks with a balanced meal, check out the best dry dog food company for options that complement homemade goodies perfectly.
Lastly, always label your containers with the date of preparation. This little step helps you keep track of freshness and ensures your pet only enjoys the best. Treat time should be fun and safe, so enjoy the process and watch your furry pal relish each bite!