


Begin with whole ingredients like oats, pumpkin, and peanut butter. These not only provide essential nutrients but also create a delightful aroma that your furry friend will adore. A simple mix of one cup of oats and half a cup of pure pumpkin is a great base to start.
Incorporate a binding agent like flour, with options such as whole wheat or oat flour, depending on your dog’s dietary needs. For a tasty variation, consider adding mashed banana or applesauce to enhance flavour and moisture. Aim for a dough consistency that is easy to roll out but not overly sticky.
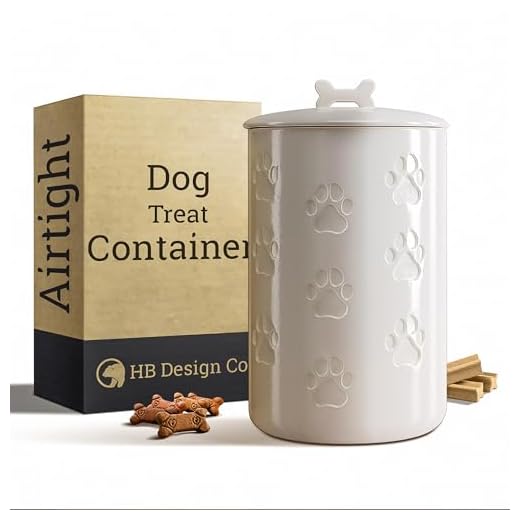
Bake the mixture at 180 degrees Celsius for about 20-25 minutes, until they are golden brown and firm. Let them cool completely before serving. This ensures they harden up nicely, creating a satisfying crunch that most pups love. Storage is simple; just keep them in an airtight container for freshness.
Experimenting with flavours keeps things exciting. Try adding cinnamon or a dash of honey for a sweet twist, but always check for allergies first. Remember, the best part of creating these snacks is seeing the joy on your pet’s face when they get a taste of your handiwork!
Creating Homemade Snacks for Your Canine Companion
For a delightful and nutritious reward, consider using pumpkin and peanut butter. Both ingredients are safe and tasty for your furry friend. Here’s a simple recipe to get you started:
Ingredients
- 1 cup of pure pumpkin puree
- 1/2 cup of natural peanut butter (ensure it’s xylitol-free)
- 2 cups of whole wheat flour
- 1 egg
- 1/2 teaspoon of cinnamon (optional)
Instructions
- Preheat the oven to 180°C (350°F).
- In a mixing bowl, combine pumpkin puree and peanut butter until smooth.
- Add the egg and mix thoroughly.
- Gradually incorporate whole wheat flour and cinnamon into the mixture. Stir until a dough forms.
- Roll out the dough on a floured surface to about 1/2 inch thick.
- Use cookie cutters to shape the goodies and place them on a baking sheet lined with parchment paper.
- Bake for 20-25 minutes until golden brown.
- Allow to cool completely before serving.
Store these delicious morsels in an airtight container. They can last up to two weeks, but I usually find they disappear much quicker!
Choosing the Right Ingredients for Healthy Canine Snacks
Opt for whole, natural foods like oats, pumpkin, and sweet potatoes. These are not only nutritious but also gentle on your pet’s stomach. I remember when I first introduced sweet potatoes to my furry friend; his energy levels soared, and he loved the taste.
Protein Sources
Include lean meats such as chicken or turkey. These provide essential amino acids for muscle health. One day, I decided to bake some chicken and blend it into a mixture. The joy on my pup’s face was priceless–he couldn’t get enough!
Avoid Harmful Additives
Stay clear of artificial preservatives and excessive sugars. Ingredients like xylitol are toxic to pets. I once bought a store-bought version without checking the label; it was a lesson learned. Always read labels and stick with ingredients you can recognise. Fresh herbs like parsley can be a delightful addition, offering fresh breath and extra nutrients.
Experiment with combinations, and pay attention to what your companion enjoys. Customising recipes to suit their preferences is part of the fun. With the right selections, you ensure your furry friend gets the best, bite after bite.
Step-by-Step Guide to Baking Homemade Pet Snacks
Start with a preheated oven at 175°C (350°F). This ensures a perfect bake for your furry friend’s goodies. Use parchment paper to line your baking sheet, making clean-up easier and preventing sticking.
Gather Your Supplies
You’ll need a mixing bowl, measuring cups, and spoons, along with a rolling pin and cookie cutters for shaping. Choose a fun shape that your canine companion will love–think bones or paws!

Mixing Ingredients
Combine dry components like whole wheat flour and oats in one bowl. In another bowl, mix wet elements like peanut butter and mashed bananas or pumpkin puree. Gradually add the dry mixture to the wet, stirring until a dough forms. If it feels too sticky, sprinkle a bit more flour until it’s manageable.
Roll out the dough on a floured surface to about 1 cm thick and cut out your preferred shapes. Place them on the lined baking sheet, ensuring some space between each piece to allow for expansion during baking. Bake for 20-25 minutes until golden brown.
Let the baked goods cool completely before serving. Store them in an airtight container to keep them fresh. For a balanced diet, consider pairing these with the best dog food made in germany for your pet.
Making these snacks can be a delightful bonding experience. Your canine will surely appreciate the effort and love put into their special treats!
Tips for Customising Canine Snack Flavours
Start by incorporating ingredients that your furry friend already enjoys. Experiment with common flavours like peanut butter, pumpkin, or sweet potato. Each of these can be mixed with base ingredients such as oats or whole wheat flour for a wholesome snack.
- Peanut Butter: Ensure it’s xylitol-free. Mix it with oats and a bit of water for a chewy texture.
- Pumpkin Puree: Adds moisture and a rich flavour. Combine with cinnamon for added aroma.
- Sweet Potato: Boil and mash it, then blend it with flour for a tasty and nutritious option.
Consider adding proteins like shredded chicken or beef stock to enhance taste. This can make the goodies more appealing, especially for picky eaters.
Herbs can also elevate flavours. Parsley freshens breath, while mint can add a refreshing twist. Use these sparingly to avoid overpowering other ingredients.
- Combine your chosen base ingredient with wet components like peanut butter or puree.
- Fold in proteins or herbs to create a unique blend.
- Shape the mixture into fun forms using cookie cutters or moulds.
- Bake at a moderate temperature until golden brown and firm.
Don’t shy away from experimenting with fruits. Apples (without seeds) or blueberries can offer sweetness and antioxidants. Just ensure any additions are safe for consumption.
Lastly, always observe your pet’s reaction to new flavours. A little trial and error will lead you to the perfect combination that keeps those tails wagging!
Storing Your Homemade Canine Delicacies Properly
To keep your freshly baked goodies safe and tasty, store them in an airtight container. This simple step prevents moisture from ruining the texture and flavour. I found that glass jars or plastic containers with tight lids work wonders. If you’re making a large batch, consider dividing them into smaller portions for easier access and to maintain freshness.
Temperature Matters
For short-term storage, keep your treats at room temperature. However, if you plan to keep them for more than a week, refrigeration is a smart choice. Just remember to let them reach room temperature before serving, as most pets prefer their snacks slightly warmed.
Freezing for Longevity
If you want to extend the shelf life significantly, freezing is a great option. Place individual pieces in a freezer-safe bag or container, removing as much air as possible. I’ve done this with success, and my furry friend always enjoys them, even after a month in the freezer. Just thaw a few ahead of time for a quick snack!
| Storage Method | Duration |
|---|---|
| Room Temperature | Up to 1 week |
| Refrigeration | 1 to 2 weeks |
| Freezing | Up to 3 months |
Keeping track of expiration dates is also wise. I often label my containers with the date of baking, ensuring nothing goes to waste. By following these storage tips, you can ensure that your canine companion enjoys delicious and safe snacks every time!
Understanding Dietary Restrictions and Allergies
Always consult with a vet before introducing any new ingredients. I learned this the hard way when my furry companion had a reaction to a popular grain. It turned out he was sensitive to wheat. This experience taught me to read labels carefully and be aware of common allergens.
Common sensitivities include grains, dairy, beef, chicken, and certain vegetables. Each pet is unique, so keeping a food diary can help identify triggers. My friend’s Labrador had issues with chicken, which was surprising since it’s often considered a safe protein source. If your companion shows signs like itching, digestive upset, or unusual behaviour after eating, it’s time to reassess their diet.
Identifying Allergens
Understand that symptoms can vary widely. Some pets might experience skin irritations, while others may have gastrointestinal issues. I remember noticing my dog’s fur was dull and he was scratching incessantly. After switching to a grain-free option, his coat improved significantly.
When trying new ingredients, introduce them one at a time. This approach allows you to monitor any adverse reactions. If you spot a problem, eliminate the new item and consult your vet for guidance.
Choosing Safe Alternatives
There are numerous alternatives available. Sweet potatoes and pumpkin are excellent substitutes for grains, providing fibre and nutrients. For protein, consider fish or novel sources like kangaroo or rabbit, especially if your pet has common protein allergies.
Always opt for high-quality ingredients from reputable suppliers. Avoid fillers and artificial additives, as these can exacerbate sensitivities. A simple recipe using oats, peanut butter (ensuring it’s xylitol-free), and pumpkin can be a safe and nutritious option.
Keep monitoring your furry friend’s reaction to homemade goodies. Adjust recipes as needed to find the perfect balance of taste and safety. Your pet’s health and happiness depend on it.
Creative Ways to Use Leftover Canine Snacks
Mix leftover goodies into your pet’s regular meals. Crumble them over kibble or stir them into wet food for an instant flavour boost. My own furry companion, Max, goes wild for this combination, making mealtime much more exciting for him.
DIY Puzzle Games
Transform old morsels into engaging puzzles. Hide pieces inside a muffin tin, cover them with tennis balls or similar items, and let your pet figure out how to retrieve their reward. This not only entertains but also stimulates their mind. I’ve seen Max spend ages happily working through his puzzle, which keeps him active and alert.
Homemade Training Rewards
Crush the remnants into smaller bits for use as training rewards. This way, you minimise waste while reinforcing good behaviour. I often break down treats into tiny pieces for Max during training sessions. They’re just the right size to motivate him without overwhelming his appetite.
Consider blending them into a homemade broth. Simmer leftover snacks with water and your choice of veggies, then strain the mixture. Pour the broth over dry food or freeze it in ice cube trays for a refreshing summer snack. Max loves slurping up the broth during hot days.
Lastly, if you enjoy baking, incorporate leftover goodies into new recipes. Add crushed bits into homemade biscuits or energy balls. This not only prevents waste but introduces new flavours, which my pup always appreciates. It’s a win-win for creativity and sustainability!
FAQ:
What ingredients do I need to make homemade dog treats?
To prepare homemade dog treats, you’ll need a few simple ingredients. Common choices include whole wheat flour, oats, peanut butter (ensure it’s xylitol-free), pumpkin puree, eggs, and various dog-safe fruits or vegetables like carrots or apples. Depending on the recipe, you might also include chicken or beef broth for added flavour. Always check that the ingredients are safe for dogs, avoiding anything toxic such as chocolate, grapes, or onions.
How long can I store homemade dog treats?
Homemade dog treats can be stored for varying lengths of time depending on how they are made and stored. If you keep them in an airtight container at room temperature, they can last about a week. For longer storage, consider refrigerating them, which can extend their shelf life to about two weeks. If you want to keep them for even longer, you can freeze the treats, allowing them to last for several months. Just be sure to thaw them before giving them to your dog.
Can I use any type of flour for making dog treats?
While whole wheat flour is a popular choice for dog treats due to its nutritional value, you can use other types of flour as well. Alternatives like oat flour, rice flour, or almond flour can be suitable, especially for dogs with wheat allergies. Always check that the flour you choose is safe for dogs, and adjust the recipe as necessary to maintain the right texture and consistency in the treats.
How can I make dog treats more appealing to my pet?
To make dog treats more enticing for your pet, consider incorporating strong-smelling ingredients like peanut butter or bacon bits, as dogs are often attracted to these scents. You can also experiment with different flavours by adding mashed fruits or vegetables that your dog enjoys. Baking the treats until they are crunchy can enhance their appeal as well. Additionally, using cookie cutters to create fun shapes can make treat time more exciting for your furry friend.
Are there any health benefits to making my own dog treats?
Yes, making your own dog treats can provide several health benefits. You have complete control over the ingredients, allowing you to avoid artificial additives, preservatives, and allergens that may be present in commercial treats. This can be particularly beneficial for dogs with dietary sensitivities. Homemade treats can also be customised to cater to your dog’s specific health needs, such as using low-fat ingredients for weight management or incorporating vitamins and minerals for overall well-being.
What ingredients are typically used to make dog treats?
Dog treats can be made using a variety of ingredients that are safe and healthy for dogs. Common ingredients include whole wheat flour, oats, peanut butter, pumpkin puree, and eggs. You can also add ingredients like shredded carrots or apples for extra nutrition. It’s important to avoid using ingredients that are toxic to dogs, such as chocolate, onions, and garlic. Always check that the ingredients you use are suitable for your dog’s dietary needs.


