


Begin by selecting a slip collar that fits properly. It should be snug enough to prevent slipping off but loose enough to avoid discomfort. I found that adjusting the collar while my pup was calm made a significant difference in how they accepted it. It’s all about creating a positive association from the very start.
Next, practice the basic commands in a distraction-free environment. Start with simple cues like “sit” or “stay” while your furry companion is on the slip collar. Use plenty of treats to encourage compliance. This helped my own pet understand what was expected, making future outings more manageable.
Introduce walking sessions gradually. Begin inside your home or in a quiet yard. Keep the leash short to maintain control but allow some slack to let your canine explore. I noticed that this balance made my pup feel more secure and less anxious, leading to a more enjoyable experience for both of us.

During walks, use gentle corrections when necessary. If your companion pulls, give a slight tug on the leash to redirect their attention back to you. Consistency is key here. Each time I did this with my own pup, they learned to pay more attention to my cues, which improved our overall dynamic.
Incorporate positive reinforcement throughout each session. Celebrate small victories with treats and praise. This method turned our training into a fun game rather than a chore, and my pup thrived on the encouragement. Remember, patience is critical; progress may be slow, but it will happen!
Utilising a Slip Lead for Training
Begin by choosing a quiet environment. A park or a less busy street works well. Keep distractions minimal. Ensure the collar is positioned high on the neck, just behind the ears, for optimal control. This allows for better communication and makes corrections more immediate. When introducing this tool, allow your companion to become familiar with it first. Let them sniff and explore the lead before attaching it.
Establishing Clear Signals
Focus on the importance of consistent cues. Use a specific word or sound for behaviours you wish to encourage, such as “heel” or “sit”. When they follow your direction, reward them immediately with praise or a treat. Timing is key; corrections should be gentle, and rewards should be given right after the desired action. The slip lead can tighten slightly when the animal pulls, serving as a gentle reminder to return to your side. Remember, it’s about guiding rather than punishing.
Building Confidence and Trust
Encourage your furry friend to feel secure on the lead by maintaining a relaxed posture. If tension builds, they may sense your anxiety. Walk at a steady pace, and if they start to pull, stop moving. Wait until they return to a calmer state before continuing. This practice reinforces the idea that pulling will not get them where they want to go. Over time, they’ll learn to stay close without constant reminders.
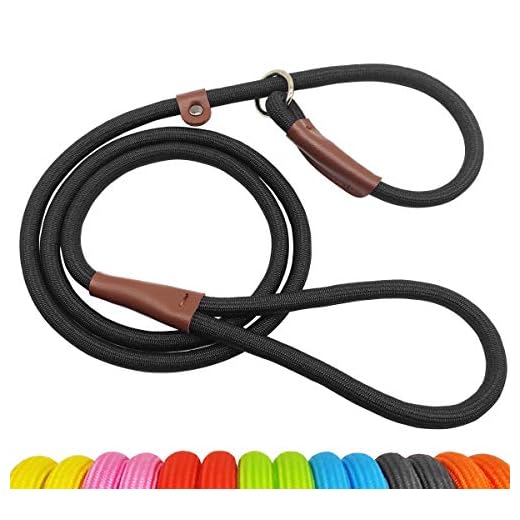
Choosing the Right Slip Lead for Your Canine Companion
Opt for a slip lead that matches your pet’s size and strength. A well-fitting collar ensures safety and comfort during walks. Here are key factors to consider:
- Material: Choose a durable fabric like nylon or cotton. Nylon is strong and water-resistant, while cotton is soft and comfortable for longer use.
- Width: Wider leads distribute pressure better, reducing strain on the neck. For larger breeds, a lead that is at least 1 inch wide is ideal.
- Length: A standard length of 6 feet provides enough space for exploration while maintaining control. Adjust according to your pet’s habits.
- Adjustability: Some leads come with adjustable loops. This feature can help in managing different situations, such as busy streets or open parks.
- Colour and Style: While this might seem trivial, a bright colour can enhance visibility during evening walks, and a stylish design can reflect your pet’s personality.
Testing the Fit
Before making a purchase, it’s wise to test the lead. Ensure it slides smoothly but also holds securely when tension is applied. Try it on your pet to check for comfort and adjustability. Remember, a well-fitted slip lead not only aids in control but also ensures your furry friend enjoys their walks.
Common Mistakes to Avoid
- Using a lead that’s too thin for a strong or large pet can cause discomfort or injury.
- Neglecting to check the material; cheap options may wear out quickly.
- Ignoring the importance of proper fitting; a loose lead can slip off, while one that’s too tight can lead to choking.
After ensuring your new lead is suitable, remember to observe your companion’s behaviour during walks. If they seem uncomfortable or resistant, reassess the fit or material. For more insights into your pet’s behaviour, check out this link: why does my dog just swallows food whole.
Fitting the Slip Lead Correctly for Comfort and Control
Ensure the collar section sits high on the neck, just below the ears. This positioning provides better control and reduces the risk of injury. The lead should be adjusted so that it forms a loose loop when not in use, allowing for comfort yet ready for action.
Steps for Proper Adjustment
1. Place the collar section over the head, ensuring it’s not too tight. A good rule of thumb is to fit two fingers between the collar and the neck.
2. Adjust the length of the lead by sliding the stopper. This prevents excessive slack while still allowing freedom of movement.
3. Check for comfort by observing reactions. If your companion seems agitated or tries to paw at it, readjust.
Common Mistakes to Avoid
– Fitting too tightly can lead to discomfort and anxiety. Always check the fit after adjustments.
– Overlooking the material can result in chafing. Opt for softer materials for sensitive skin.
| Adjustment Aspect | Recommendation |
|---|---|
| Collar Fit | Two fingers width below the ears |
| Lead Length | Loose but manageable, adjust stopper |
| Material | Soft and non-irritating |
Regular check-ups on the fit are necessary as your companion grows or if their weight fluctuates. A well-fitted harness promotes both safety and a more enjoyable experience during walks.
Introducing the Slip Lead During Training Sessions
Begin with short sessions, around 5 to 10 minutes, to allow your canine companion to adapt to the new equipment. Start indoors or in a quiet area free from distractions. Attach the collar alternative gently and let your pet get accustomed to its presence. Allow them to roam a bit while observing how they react.

Creating Positive Associations
During the initial encounters, use treats to create a positive experience. Whenever you put on the collar alternative, offer a reward. This helps develop a connection between wearing it and receiving something enjoyable. Gradually, increase the duration of wear before you begin any structured activities.
Incorporating Movement
Once your furry friend seems comfortable, introduce simple movements. Encourage them to follow you around while on a loose leash. Use enticing sounds or treats to motivate them to stay close. The aim here is to build a bond and reinforce the idea that staying near you is rewarding.
Using Positive Reinforcement with a Slip Lead
Engagement through rewards has been a game changer in my experience. Each time my canine companion displays good behaviour while guided by the lead, I offer a treat or enthusiastic praise. This builds a strong connection, reinforcing the desired actions. For instance, when we’re out for a walk and he stays close, a quick reward ensures he associates that behaviour with pleasure.
Timing is Key
Immediate rewards work wonders. I’ve found that delivering a treat or a verbal cue right after the correct behaviour makes it clear what action earned the reward. If he sits calmly at a road crossing, that moment calls for a treat. It’s all about making the link between his actions and the positive outcome as clear as possible.
Gradual Progression
Start small. My approach was to focus on one behaviour at a time. Once he mastered walking nicely beside me, I introduced new commands. This gradual method keeps him engaged and less overwhelmed. Each step forward can be celebrated, ensuring he remains motivated and eager to learn.
Avoiding Common Mistakes When Training with a Slip Lead
Focus on maintaining a relaxed grip. A tight hold can create tension, causing anxiety for the animal. I learned this the hard way when my first companion would start pulling whenever I held the lead too tightly. Keeping a gentle touch allows for better communication and reduces stress for both of you.

Timing Your Corrections
Respond promptly to unwanted behaviour. Delaying your reactions can confuse the animal, making it difficult for them to understand what they did wrong. I recall a moment with my pup where I hesitated after he jumped on a visitor. By the time I reacted, he had already moved on, and the lesson was lost. Quick feedback helps reinforce desired actions effectively.
Understanding Body Language
Pay attention to the cues from your companion. Signs of discomfort, like panting or attempting to back away, indicate that adjustments are needed. I noticed my furry friend becoming anxious during sessions when I was too forceful. Being aware of their signals helps create a more positive experience and fosters trust.