


Yes, it can be done. With the right approach, your furry friend can learn to relieve themselves in a designated area. I remember the first time I decided to try this with my own pup. I was sceptical but determined. I set aside a specific spot in the garden, making sure it was easily accessible and familiar to my pet.
Consistency is key. Every time I noticed signs that my canine needed to go, I would take them to the chosen spot immediately. Repetition helped reinforce the behaviour I wanted. I used positive reinforcement, rewarding them with treats and praise whenever they used the area correctly. This created a positive association with that space.
Timing matters too. I learned to pay attention to my pet’s routine. After meals, play sessions, or waking up from a nap, I would guide them to the spot. It took patience, but eventually, my pup started to understand what was expected. The progress was slow at first, but with dedication, we both celebrated small victories along the way.

Incorporating a schedule helped immensely. Setting regular times for visits to the designated area made the process smoother. I kept a log for the first few weeks, noting when my canine needed to go. This not only helped me anticipate their needs but also built a solid routine.
In conclusion, while it takes effort and time, teaching your furry companion to use a specific area can lead to a harmonious living situation. With patience and consistent practice, you can achieve this goal successfully.
Understanding the Concept of Indoor Elimination for Canines
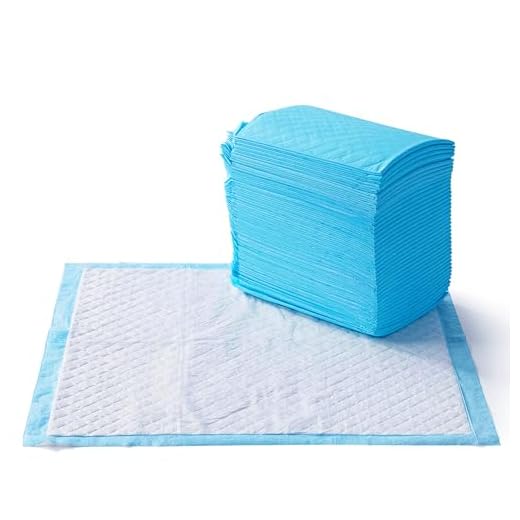
Establishing a designated space for your furry friend to relieve themselves indoors can be successful with the right approach. The key lies in consistency and positive reinforcement. Begin by selecting a specific area that is comfortable and easily accessible for them. Make this spot familiar by using absorbent materials, such as pads or specific types of substrates.
Creating a Routine
Canines thrive on routine. Set regular times for your pet to visit the designated area, ideally after meals or playtime. This predictability helps them associate these moments with the opportunity to use their space. Whenever your companion uses the area correctly, reward them immediately with praise or a small treat. This strengthens the connection between the action and the reward.
Observing Behaviour
Watch for signs that indicate your pet needs to go, such as sniffing around or circling. When you notice these behaviours, guide them to their specific spot. If accidents happen outside of the designated area, clean thoroughly to remove any lingering scents that might confuse them. Patience is key; some pets may take longer to adapt than others. Celebrate each small success to keep the process positive.
Choosing the Right Litter Materials for Your Canine Companion
Opt for biodegradable options like wood pellets or paper-based products. They absorb moisture well and reduce odours effectively. I started with wood pellets for my furry friend, and they worked wonders. The natural scent kept things fresh, and clean-up was a breeze.
Absorbency and Odour Control
Look for materials with excellent absorbency. Clay-based choices often do the trick, but be mindful of dust. I found that some clay options made my pup sneeze. Instead, I switched to a clumping, natural alternative that kept the area tidy without causing discomfort.
Comfort and Safety
Softness matters. Choose options that won’t irritate sensitive paws. I once tried a synthetic product, but it seemed harsh on my pooch’s pads. The switch to a softer, natural material made all the difference. Check for any additives or chemicals that could be harmful. Always prioritise your companion’s health and comfort.
Step-by-step guide to introducing litter training
Begin by selecting a designated area in your home where your furry companion will have access to their bathroom spot. This should be a quiet, low-traffic location, ensuring they feel safe and comfortable.
1. Gather necessary supplies
- Choose an appropriate container or tray that fits your space.
- Opt for suitable materials, such as biodegradable options or grass pads.
- Have cleaning supplies on hand for any accidents.
2. Encourage exploration
Introduce your pet to the new area. Allow them to sniff around and get familiar with the setup. Use treats to create positive associations with the space.
3. Establish a routine
- Take your friend to the designated spot after meals and naps.
- Be consistent; this helps them understand when it’s time to use the area.
4. Reward successes
Whenever your companion uses the designated area appropriately, offer praise or a small treat. This reinforces the behaviour you want to encourage.
5. Be patient and persistent
- Accidents will happen. Clean them up without scolding.
- Continue to guide them back to the designated spot if they stray.
Maintaining a balanced diet is also important during this process. For example, consider the best food to give a dog with arthritis to keep them healthy and happy as they adapt.
Every animal is unique; some may take longer to adjust than others. Keep the process positive and supportive, and you’ll likely see progress over time.
Common challenges faced during litter training
One of the most significant hurdles I’ve encountered while teaching my furry companion to use an indoor spot is consistency. It’s crucial that you stick to a routine. If you allow your pet to go outside sometimes, it can confuse them about where they should relieve themselves. Establishing a clear pattern helps reinforce the desired behaviour.
Accidents and Misunderstandings
Accidents are bound to happen. Early on, my pup would sometimes mistake the floor for their designated area. I learned that proper supervision is necessary. Keeping an eye on them, especially after meals or playtime, can help catch any signs that they need to go. Recognising their signals–like sniffing around or circling–can prevent mishaps. Using a crate when I couldn’t supervise was also a game changer, as it encourages them to hold on until they’re in the right spot.
Material Preferences
Choosing the right materials for the area can be tricky. I initially picked a type of substrate that my dog didn’t seem to like. After some trial and error, I found that natural options were much better received. It’s essential to observe how your pet reacts to different textures. Providing a variety of surfaces during the initial phase can help determine their preference, making the transition smoother.
Maintaining hygiene and cleanliness in the litter area
To keep the designated area clean, establish a routine for regular cleaning. I found that daily inspections help catch any mess before it becomes a problem. Use a scoop or shovel to remove waste and dispose of it properly. A dedicated container with a lid can help contain odours and prevent pests.
Choose a non-toxic cleaning solution to sanitise the space. I use a mixture of vinegar and water, which effectively neutralises smells without harming my furry friend. After cleaning, allow the area to dry completely before allowing access again. This helps to prevent any unwanted moisture that could attract bacteria.
Consider using absorbent pads or mats specifically designed for this purpose. These can be replaced easily and help absorb liquids, making clean-up quicker. I found that using a washable cover over the area not only makes cleaning easier but also adds an extra layer of hygiene.
Keep an eye on the surrounding environment as well. Regularly sweep or vacuum the area to remove any stray debris or fur that may accumulate. This helps to maintain a pleasant atmosphere and keeps your companion comfortable.
Lastly, ensure that your pet has access to fresh water and a balanced diet. A healthy diet can lead to more predictable bathroom habits, reducing the frequency of messes. This simple change made a significant difference in managing cleanliness in my own experience.
Evaluating the Success of Litter Training
To determine how well your furry companion has adapted to using a designated area for bathroom needs, monitor specific behaviours and patterns. A decrease in accidents outside the selected space is a strong indicator of progress. Tracking the frequency of successful uses can provide valuable insights into their comfort and understanding of the new routine.
Keep a journal to document daily observations. Note the times your pet uses the area and any signs of hesitation or confusion. This record can help identify optimal times for encouraging use, as well as pinpointing potential issues that need addressing.
Positive reinforcement plays a key role in reinforcing desired behaviours. Rewarding your furry friend immediately after they use the area correctly helps solidify the association. Over time, you can reduce treats and praise as the behaviour becomes more consistent.
Engage with your companion during the early stages. If they seem reluctant or unsure, spend time near the designated spot. This not only provides comfort but also encourages exploration. If you notice any regression, revisit earlier steps of the process to refresh their memory.
Adjusting the environment can also impact success. Ensure the area remains clean and inviting. Regularly changing materials can keep the space appealing and may help address any issues with avoidance.
Lastly, patience is crucial. Every pet is unique, and some may take longer to adapt than others. Celebrate small victories and maintain a consistent approach to help your beloved companion thrive in their new routine.


