


Choosing the right materials is critical for creating a sturdy and stylish accessory for your furry friend. I recommend using high-quality nylon cord, which is not only durable but also lightweight. This ensures comfort for your pet while maintaining strength. Start by selecting a vibrant colour that reflects your dog’s personality; this adds a personal touch to the final product.
Gather your tools: a sturdy pair of scissors, a reliable lighter, and a clip for fastening. These items will help you achieve a professional finish. As you cut your length of cord, remember to account for the desired size and style. When I crafted my first piece, I underestimated the amount needed, which taught me the importance of measuring accurately.
Once you have everything prepared, the real fun begins. The weaving process can be quite therapeutic, and it allows for creativity. I discovered various patterns online that inspired my designs. Experimenting with different weaves not only enhances the look but also increases the strength of the finished item. My first attempt was a simple braid, which turned out to be both functional and pleasing to the eye.

Don’t forget to seal the ends of the cord with a lighter. This step prevents fraying and extends the life of the accessory. After completing your project, take a moment to admire your handiwork. There’s something incredibly satisfying about crafting an item that is both practical and unique for your beloved companion.
Crafting a Unique Canine Accessory
Begin with approximately 10 to 15 feet of sturdy cord. The length depends on the size needed for your furry friend. Choose vibrant colours or patterns to reflect their personality. A solid base colour paired with a contrasting weave can create an eye-catching effect.
Next, prepare a suitable clip or fastening mechanism. A metal or plastic clasp, depending on your preference, will ensure durability. Ensure it’s easy to use but secure enough to withstand playful behaviour.
Utilise a simple knotting technique to create a strong and appealing design. The cobra stitch or ladder weave works well for both aesthetics and strength. Practice the knots beforehand, as a well-executed pattern will enhance the overall look.
As you work, keep tension consistent to avoid loose sections. This will help maintain the integrity of the accessory and ensure it fits snugly without being restrictive. Consider finishing the ends with a heat source to prevent fraying, enhancing longevity.
Finally, don’t forget to clean your creation regularly. Using the best washing machine cleaner to remove smells can help keep it fresh, ensuring your companion looks and feels great on their adventures. Regular maintenance will add to the lifespan of your handiwork, making it a cherished item for years to come.
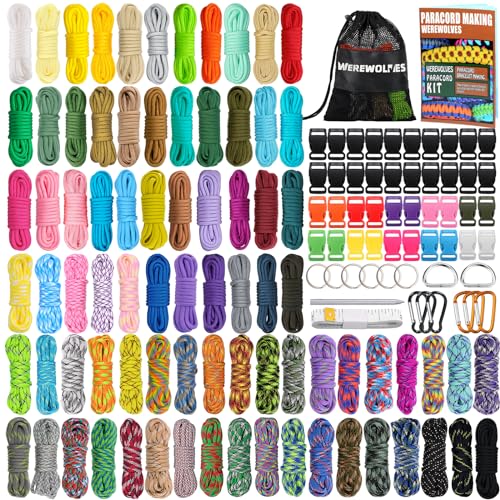
Choosing the Right Type of Paracord
For crafting a sturdy and stylish accessory, opt for 550 paracord. This specific type boasts a tensile strength of 550 pounds, ensuring durability under various conditions. It consists of seven inner strands, providing flexibility while maintaining strength. You might want to consider the colours and patterns available, as they can reflect your pet’s personality.
If you’re looking for something lighter, 325 paracord could be a good choice. It retains decent strength while offering a thinner profile, perfect for smaller breeds. However, keep in mind that it won’t hold up as well under extreme stress.
Additionally, think about the type of finish you prefer. Some cords come with a smooth texture, while others feature a more rugged feel. A smoother finish can be more comfortable against your pet’s skin, reducing irritation during wear.
Lastly, always check the material composition. Nylon is the most common, known for its resistance to UV rays and moisture. This makes it ideal for outdoor adventures. If your pet enjoys swimming or playing in the rain, a nylon variant will hold up better than other materials.
Measuring Your Pet for the Perfect Fit
Begin by gathering a soft measuring tape. Wrap it around your furry friend’s neck, placing it just below the ears where the collar will sit comfortably. Ensure that the tape is snug but not tight; you should be able to fit two fingers between the tape and their neck. Record this measurement.
Adjusting for Comfort
Consider your companion’s coat and size. If they have a thick fur coat, add an extra inch to your initial measurement to accommodate the fluffiness. For smaller breeds, be cautious not to make it too loose, as it could slip off easily.
Double-Checking Measurements
Recheck your measurements after a day or two. Pets can fluctuate in weight, especially if they are seniors or recovering from any health issues. For those looking for nutritious options, check out the best dog food for senior beagles to support their health.
Once you’ve confirmed the fit, you’ll be ready to proceed with crafting your unique accessory. A proper fit not only ensures comfort but also enhances safety during walks and playtime.
Essential Tools for Crafting the Collar
Start with a sturdy pair of scissors. A clean cut is crucial for a polished look. Invest in a good quality scissors that can easily slice through the cord without fraying the ends.
Next, grab a lighter or heat source. This will help you seal the ends of the cord to prevent any unraveling. Be cautious while using it; a little heat goes a long way.
A measuring tape is another must-have. Accurate measurements ensure that the final product fits your furry friend perfectly. Always double-check your measurements before cutting.
Additional Handy Tools
- Clips or clamps: These can hold the cord in place while you work, making the process smoother.
- Ruler: For precise measurements and ensuring symmetry in your design.
- Needle and thread: Useful for adding embellishments or securing components that need extra durability.
Optional Accessories
- Decorative beads: If you want to add some personality, beads can enhance the aesthetic.
- Personalisation tools: Consider stencils or engravers for adding your pet’s name.
Having these tools ready will streamline the crafting process, allowing you to focus on creating a unique accessory for your companion. The right equipment makes a noticeable difference in the quality and durability of the finished product.
Step-by-Step Guide to Weaving Paracord
Begin with a length of cord approximately five times the desired final length. This will allow for enough material to create the intricate weave while ensuring durability.
Secure the cord’s midpoint to a stable surface using a clip or a sturdy knot. This central point will serve as your anchor and keep everything balanced during the weaving process.
Now, take the two working ends of the cord and create a loop. This will form the starting point of your design. It’s essential to maintain even tension throughout the weaving to ensure consistency in your final product.
For the first knot, pull one end over the other, then weave it through the centre loop. Tighten the knot firmly but not excessively to allow for adjustments later. This forms the base of your pattern.
Continue weaving by alternating the cords, following a specific pattern such as a simple square or a more complex braid. Keep an eye on the number of knots you make; this will determine the thickness of the final piece.
If you desire a colour pattern, switch cords at regular intervals. This adds a personal touch and can reflect your pet’s personality or your own style.
Periodically check the length as you weave. It’s easier to adjust while working than to fix it later. Once you reach the desired length, tie off the end securely with an additional knot to prevent unraveling.
Finish by trimming any excess cord and sealing the ends with a lighter to prevent fraying. A clean finish enhances the appearance and longevity of your creation.
With practice, this technique can be adapted to various designs and styles, making each new piece unique. Enjoy the process and the satisfaction of crafting something special for your furry friend!
Adding Personalised Features to Your Collar
Consider incorporating your pet’s name or a special phrase into the design. Using a lighter colour for the base and darker shades for the lettering creates a striking contrast. You can use a simple embroidery technique or even sew on fabric letters that represent your furry friend’s personality. I recently added “Adventure Buddy” to my own creation, and it makes every outing feel even more special.
Custom Colour Patterns
Experiment with colour combinations to reflect your canine’s character. For example, a playful pup might suit bright, bold colours, while a more laid-back companion could look great in earthy tones. Create patterns that resonate with their traits. I crafted a spiral pattern for my pooch, alternating between blue and green, evoking the outdoor adventures we share.
Unique Attachments and Charms
Adding charms or attachments can give a collar a unique flair. Consider including a small tag with your contact information or even a charm that represents something meaningful, like a little paw print or a heart. I once attached a tiny compass charm, symbolising my love for nature hikes with my pet. It’s a conversation starter every time I take him out.

| Feature | Description |
|---|---|
| Name Embroidery | Personalise with your pet’s name for easy identification. |
| Colour Patterns | Create a design that reflects your pet’s personality. |
| Charms | Attach meaningful symbols or tags for added personality. |
Adding these personalised features not only enhances the aesthetic but also makes the collar a true reflection of your bond. Each time you take your companion for a stroll, it will become a badge of honour, showcasing the unique connection you share.
Maintaining and Caring for Your Paracord Accessory
To keep your crafted item looking fresh and lasting long, regular cleaning is key. Use mild soap and warm water to gently scrub the surface. A soft brush can help get into the knots and weaves without damaging the material. Rinse thoroughly to avoid soap residue, then allow it to air dry completely before using it again.
Storage Tips
When not in use, store the item in a cool, dry place away from direct sunlight. This prevents fading and degradation of the fibres. Avoid hanging it on sharp hooks or edges that could snag the cords. Instead, consider a dedicated storage bag or box to keep it safe and tidy.
Inspecting for Wear and Tear
Regularly check for signs of wear, such as fraying or loosening knots. If you notice any damage, repair it promptly to ensure safety. For minor frays, you can trim the ends and re-seal them with a lighter. If knots are coming undone, re-tighten them or consider reweaving that section. Keeping a close eye on the condition will ensure it remains sturdy and reliable for your furry friend.


