


Start with a base of marshmallows and icing sugar to form the perfect pliable substance. Melt a generous amount of marshmallows in the microwave, stirring until smooth. Gradually incorporate sifted icing sugar, kneading until it reaches a soft, malleable consistency. This mixture will serve as the canvas for your furry masterpiece.
Think about the breed you want to represent. For a playful terrier, focus on crafting distinct features like perky ears and a wagging tail. Use food colourings to achieve the desired shades; this will bring your creation to life. Small tools, such as modelling knives and fondant extruders, can help shape the finer details like the snout and paws.
As you assemble your canine creation, remember to let each component set before adding the next. This ensures stability and allows your work to maintain its form. A touch of edible glitter can add a fun sparkle, making your edible pup even more eye-catching. With patience and creativity, you’ll have a delightful canine treat that’s sure to impress your friends and family.

Crafting a Canine Creation
For a delightful canine-themed treat, begin with a simple base mixture of sugar and glucose syrup. This combination should be kneaded until you achieve a smooth texture that holds its shape well. Colouring can be added for realistic fur tones or accents; gel colours work best, as they won’t alter the consistency of the mixture.
Forming the Features
Once the base is ready, divide it into sections for different parts of the creature. For the body, roll a large ball and shape it into an oval. The legs can be formed by rolling smaller pieces into cylindrical shapes, attaching them securely to the body with a bit of water for adhesion. The head should be slightly larger than the legs, shaped into a round form, and then flattened slightly to create a snout.
Adding Details
Use a small tool or a toothpick to create eyes, nose, and mouth. Small balls can be rolled out for the eyes, and a tiny piece for the nose. To add texture, consider using a brush to create fur patterns or small indentations. For ears, flatten two small pieces and attach them to the head. You can even create accessories, like a collar, using contrasting colours.
| Ingredient | Amount |
|---|---|
| Powdered sugar | 500g |
| Glucose syrup | 60ml |
| Water | 1 tablespoon |
| Gel food colour | As needed |
For more information on canine care, check out this insightful article on why food moves through dogs tract fast. Also, if you’re curious about privacy concerns while recording your furry friends, take a look at are outdoor security cameras an invasion of privacy.
Gathering the Necessary Materials for Creating a Canine Masterpiece
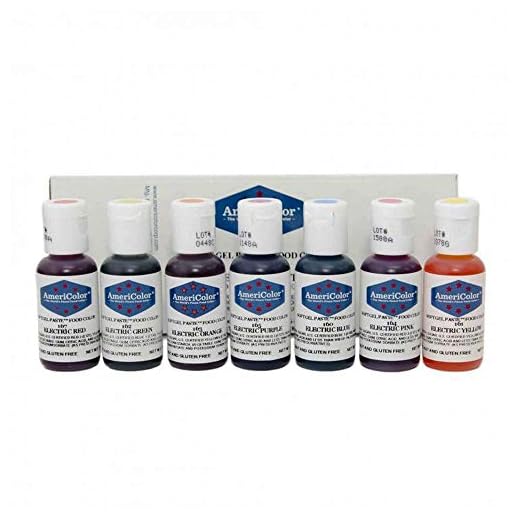
Start with quality modelling paste, which will form the base of your creation. Look for products that are pliable and easy to work with, ensuring smooth results. You’ll also need food-safe colours to achieve the perfect shades for your pup’s fur, eyes, and accessories. Gel colours work best, as they provide vibrant hues without altering the consistency of your paste.
Tools for Sculpting
A set of sculpting tools is crucial. Invest in a ball tool for shaping, a blade for cutting, and a paintbrush for detailing. These will help you achieve the finer points of your canine’s features, from the texture of the fur to the expression in its eyes. Additionally, a rolling pin will be handy for flattening the paste, while a non-stick mat will prevent sticking during the crafting process.
Additional Supplies
Don’t forget about edible glue or water for attaching different parts together. A small paint palette can assist in mixing colours to get just the right shade. If you want to add some flair, edible glitter can enhance the final look of your creation. Lastly, have some cornstarch or icing sugar on hand to dust your surfaces and tools, keeping everything manageable and mess-free.
Choosing the Right Sugarpaste for Your Canine Model
Selecting the appropriate sugarpaste is crucial for achieving the desired look and texture of your canine creation. Consider the following points:
- Texture: Look for a pliable and smooth variety. This ensures easy shaping and prevents cracks.
- Colour: Choose a range of colours that match your vision. You can opt for pre-coloured options or white paste, which can be tinted using gel food colours.
- Taste: While aesthetics matter, flavour can enhance the overall experience. Go for a sugarpaste with a pleasant taste, especially if the model will be used for consumption.
- Brand: Research reputable brands. Some might offer better elasticity and durability than others. Reading reviews can guide you towards the best choice.
- Storage: Check the longevity of the product. A good sugarpaste should have a decent shelf life when stored correctly, allowing you to plan ahead.
In my experience, I once used a marzipan-based option for a project, and while it was delicious, the texture was not ideal for intricate details. Since then, I always opt for a high-quality sugarpaste to ensure the final model is both appealing and sturdy.
Experimenting with different types can help you discover what works best for your specific needs. Don’t hesitate to mix and match, as combining different brands can lead to unique effects and textures.
Shaping the Body Parts of the Canine Creation
Begin with the torso, forming an oval shape from the pliable mixture. This will serve as the main body. Ensure it’s proportionate to the head you crafted earlier. Gently press and roll to create a smooth surface, avoiding any cracks.
Creating the Legs
For the legs, roll four equal-sized pieces into cylindrical forms. Slightly taper one end to mimic the paws. Attach these to the torso using a small amount of water or edible glue to secure them. Remember to angle the front legs slightly forward for a natural stance.
Crafting the Tail and Ears
Shape a small, elongated piece for the tail, making it as thick or thin as you prefer. Attach it to the back of the body with a gentle press. For the ears, roll two teardrop shapes and flatten them slightly. Position them on top of the head, adjusting the angle for a lively look. To add detail, use a knife to make gentle slits for texture.
Pay attention to proportions throughout the process; a well-shaped figure captures the essence of your furry friend. These details elevate your edible model, making it a delightful centrepiece.
Adding details: eyes, nose, and ears
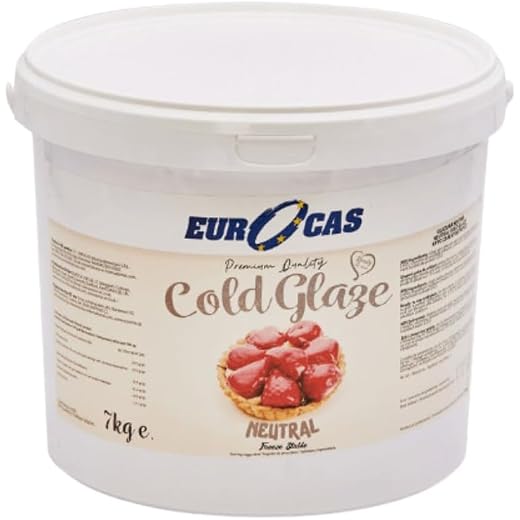
Focus on crafting the eyes first. Use small balls of black sugar paste for the pupils and white for the sclera. Flatten the white pieces slightly before placing the black balls in the centre. This contrast creates a lifelike appearance. For a glossy effect, a tiny dab of edible glaze can enhance realism.
Next, the nose requires a mix of black and chocolate-coloured paste. Shape it into a small triangle or oval, depending on the breed you’re replicating. Pay attention to details; indentations can be made with a toothpick or a small tool to represent nostrils. This step adds depth to the snout.
Ears can be made from thin sheets of rolled paste. Depending on the dog type, cut the shapes accordingly–floppy or upright. Use a small modelling tool to create texture and folds, mimicking fur. Attach them to the head with edible glue or a little water, ensuring they sit naturally. Positioning is key; they should complement the overall expression you want your creation to convey.
Lastly, don’t overlook the finishing touches. A light dusting of petal dust can add dimension to the ears and enhance the character of your little canine creation. These small details transform a basic model into something special, showcasing your skills and attention to craftsmanship.
Techniques for colouring and decorating your canine confection
To achieve the perfect hue for your creation, start with gel or paste food colours. These provide vibrancy without altering the texture. Use a toothpick to add a small amount of colour to your mixture. Knead until the shade is uniform. For a more nuanced look, blend different colours together–just keep track of the ratios for consistency in future projects.
For a realistic finish, consider using edible dusts or powders. These can enhance features like fur or give a shimmer to the eyes. Apply with a soft brush, focusing on areas you want to highlight. If your pup has a specific breed pattern, using a stencil can help achieve precise markings.
When it comes to the eyes, using black and white fondant can create an adorable, lifelike expression. Shape small balls for the eyes, flatten them, and add a tiny white dot for the reflection. This detail brings your creation to life.
For a textured effect, consider using a small brush or a toothpick to create fur-like patterns. This can be particularly fun for breeds with distinct fur textures. Gently brush or poke the surface to mimic the natural flow of fur. Experiment with different techniques until you find the one that captures the essence of your furry friend.
Lastly, don’t shy away from accessories. A tiny bow tie, collar, or even a mini toy can add personality and flair. Use contrasting colours to make them stand out against the main body. These small touches can elevate your confection from simple to spectacular.
Implementing Support Structures for Larger Canine Models
For larger creations, a sturdy support system is crucial. Start with a base made from cake boards. Layer several boards together for added strength. Cut them to the desired shape, ensuring they can hold the weight without bending or sagging. This foundation prevents your masterpiece from toppling over during assembly and decorating.
Using Internal Supports
Incorporate internal supports such as dowels or straws within the body. Insert them vertically into the torso and legs to provide stability. These supports should be cut to the appropriate height so they don’t protrude from the exterior. For larger figures, consider using a lightweight framework, like a wire skeleton, which can help in maintaining the structure while you shape the exterior.
Securing Body Parts
Join different parts securely with edible glue or melted chocolate. This will hold the limbs and head in place while you work on the details. It’s wise to let each section set for a short period before attaching the next, ensuring everything stays aligned. If needed, prop the figure with small items like cups or cans until the glue sets and the structure is solid.

Storing and Displaying Your Edible Creation Safely
Place your sugary sculpture in a cool, dry area, away from direct sunlight. High humidity can cause it to become sticky and lose shape.
Use an airtight container if storing for more than a day. This prevents moisture from affecting its texture. Consider the following:
- Line the container with parchment paper to avoid direct contact.
- Ensure the container is large enough to prevent crushing any details.
If you need to transport your masterpiece, secure it in its container with bubble wrap or packing peanuts for extra cushioning. Here are tips for displaying:
- Select a sturdy base, such as a cake board or a decorative plate.
- Keep it away from heat sources like ovens or radiators.
- Opt for a display case if you want to showcase it long-term; glass helps keep out dust.
For longevity, avoid touching the surface frequently. Oils from your skin can mar the appearance. If you notice any cracks or drying out, a light mist of water from a spray bottle can help rejuvenate the surface.
Lastly, enjoy your creation! Sharing photos online or with friends can bring joy, but always remember to keep it safe and sound until you decide to enjoy it. Happy crafting!


