


Start with a blend of whole wheat flour and oats for a nutritious base. This combination not only provides fibre but also ensures that the snacks are gentle on your pet’s stomach. Add a pinch of baking powder to help them rise gently and create a fluffy texture. Remember, no sugar is necessary; there are plenty of natural flavours that will delight your furry friend.
Incorporate mashed bananas or pumpkin puree for added sweetness and moisture. Both ingredients are safe for dogs and packed with vitamins. Just make sure to use pure pumpkin, not the spiced pie filling, which can upset their tummy. For a protein boost, consider adding a scoop of peanut butter, ensuring it’s free from xylitol, as this sweetener is toxic to dogs. Mixing these ingredients creates a batter that’s both tasty and wholesome.

Cook the mixture on a non-stick skillet over medium heat. A few minutes on each side should suffice to achieve a golden-brown finish. Cut into bite-sized pieces once cooled, making it easy for your pet to enjoy. These delightful morsels are perfect for special occasions or just a fun treat to brighten their day.
Delicious Treats for Your Canine Companion
Start with whole wheat flour for a nutritious base. It’s a healthier alternative compared to regular flour and safe for your furry friend.
Mix in mashed bananas or unsweetened applesauce to add natural sweetness. These ingredients not only enhance flavour but also provide essential vitamins.
Incorporate an egg for binding. Eggs are a great source of protein and beneficial for your pet’s coat.
Don’t forget to include a splash of low-fat milk or water to achieve the right consistency. Aim for a pancake batter that’s easy to pour but not too runny.
Cook on a non-stick skillet over medium heat. Flip once bubbles start to form on the surface. Each side should be golden brown, usually taking 2-3 minutes.
Let cool completely before serving. This step is crucial to prevent burns and ensure your companion enjoys the treat safely.
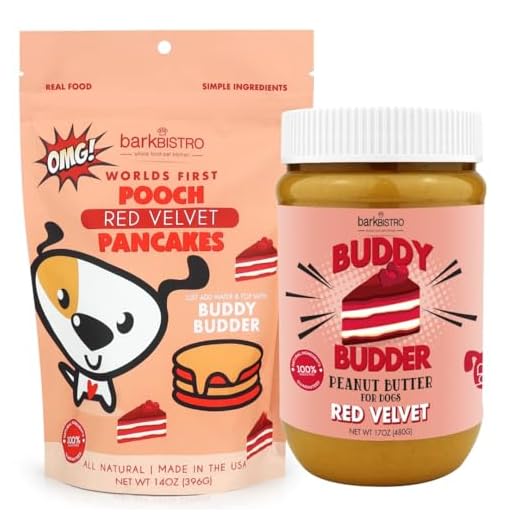
- For added flavour, consider mixing in peanut butter (ensure it’s xylitol-free).
- Carrots or pumpkin puree can also be excellent ingredients for variety.
- Store leftovers in the fridge for up to a week or freeze them for longer preservation.
Watch your pet’s reaction when they taste these goodies! It’s always a joy to see their wagging tail and happy face.
Choosing Safe Ingredients for Canine Treats
Opt for whole wheat flour as a base, as it’s gentle on the tummy and provides fibre. Avoid refined flours, which can lead to digestive issues. Incorporate mashed bananas or pureed pumpkin for natural sweetness and moisture. Both are packed with nutrients and are safe for your furry friend.
When selecting dairy, stick to plain yogurt or cottage cheese. These options are easier to digest compared to regular milk, which some dogs may struggle with. Always ensure there are no added sugars or artificial ingredients in the yogurt.
For added flavour, consider incorporating peanut butter. Just double-check that it doesn’t contain xylitol, a sweetener toxic to pets. A small amount of honey can also be a nice touch, but limit it to avoid excess sugar.
Protein Boost
Including eggs serves as a great protein source. They help bind the mixture while providing essential amino acids. If your pooch has allergies, opt for an egg substitute such as flaxseed mixed with water.
Fresh Additions
Chopped fruits like blueberries or apples (without seeds) can enhance the treats with vitamins and antioxidants. Just be mindful of portion sizes to prevent any stomach upset. For more specific dietary needs, check out this best wet dog food for mini dachshund for inspiration on healthy feeding.
Always avoid toxic ingredients such as chocolate, grapes, and onions. This ensures your homemade goodies are safe and enjoyable. And while you’re at it, keep your kitchen clean, just like you would after using a spear and jackson pressure washer. A tidy space encourages safe, fun cooking adventures with your furry companion.
Step-by-Step Recipe for Canine-Approved Flapjacks
Gather the following ingredients:
- 1 cup whole wheat flour
- 1 large egg
- 1 cup unsweetened applesauce
- 1/4 cup peanut butter (ensure it’s xylitol-free)
- 1/2 cup water (adjust for consistency)
Preparation Instructions
1. In a mixing bowl, combine the flour, egg, applesauce, and peanut butter. Stir until the mixture is well-blended.
2. Gradually add water, mixing until you achieve a thick yet pourable batter. Adjust the water to get the desired consistency.
3. Preheat a non-stick skillet over medium heat. Lightly grease with a bit of oil if needed.
4. Pour a small amount of batter onto the skillet. Cook for about 2-3 minutes or until bubbles form on the surface.
5. Flip the treat and cook for another 2-3 minutes until golden brown.
Serving Suggestions
Let the flapjacks cool before serving them to your furry pal. Cut into bite-sized pieces for easier munching. These can be stored in an airtight container in the fridge for up to a week.
| Ingredient | Purpose |
|---|---|
| Whole wheat flour | Base for the treat, providing a source of carbohydrates. |
| Egg | Binding agent, adds protein and nutrients. |
| Applesauce | Natural sweetness and moisture. |
| Peanut butter | Flavor enhancer and source of healthy fats. |
| Water | Adjusts the batter consistency for cooking. |
Cooking Techniques to Ensure Fluffy Treats
Start with room temperature ingredients. This simple step helps to create a smoother batter, resulting in a lighter texture. Cold elements can hinder the rising process, so let eggs and dairy sit out for about 30 minutes before mixing.
Incorporate baking powder or baking soda for leavening. Ensure these agents are fresh, as expired products won’t provide the necessary lift. Mix the dry ingredients separately before adding to the wet mixture; this ensures even distribution and prevents clumping.
Whisk gently. Over-mixing can lead to dense results. Aim for a few lumps in the batter; this indicates that you’ve combined the ingredients just right. The goal is to keep some air in the mix, which contributes to fluffiness.
Let the batter rest for a few minutes. This allows the flour to hydrate and the leavening agents to activate, leading to a lighter final product. During this time, bubbles will form, which will expand during cooking.
Cook on a preheated, non-stick surface. A medium heat setting works best. Too hot, and the outside will burn while the inside remains uncooked. Flip only once bubbles appear on the surface, indicating readiness for turning. This technique helps maintain a soft centre.
Lastly, consider adding a splash of vanilla or cinnamon for subtle flavour enhancements. These additions can elevate the taste without overwhelming the basic recipe, creating a delightful experience for your beloved companion.
Creative Toppings Your Pup Will Love
Try these delightful toppings to elevate your furry friend’s breakfast experience:
- Peanut Butter Swirl: A classic favourite. Spread a thin layer of unsweetened peanut butter on top for added flavour. Ensure it’s xylitol-free to keep it safe.
- Banana Slices: Thinly slice ripe bananas and layer them on top for natural sweetness. They also provide potassium, which is great for your pet.
- Greek Yogurt Drizzle: A dollop of plain, unsweetened Greek yogurt adds creaminess. It’s a fantastic source of protein and probiotics.
- Blueberry Burst: Fresh or frozen blueberries can be sprinkled on top. They are packed with antioxidants and are a tasty treat.
- Coconut Flakes: Unsweetened coconut flakes can add a tropical twist. They’re rich in fibre and healthy fats.
- Sweet Potato Mash: Cook and mash sweet potatoes for a nutritious topping. Their natural sweetness will make your pet’s eyes light up!
- Carrot Shreds: Grate some fresh carrots for a crunchy texture. They’re low in calories and high in vitamins.
- Apple Slices: Thin slices of apple (without seeds) can add a crisp, refreshing taste. They’re a great source of vitamins A and C.
Mix and match these toppings to create a breakfast your pet will eagerly anticipate. Each option adds not only flavour but also nutritional benefits, making every bite a joyful experience!
Storing and Serving Leftover Treats for Pups
To keep those delicious goodies fresh, store any extras in an airtight container in the fridge. They should last for about three to five days. If you want to extend their shelf life, consider freezing them. Just place the cooled treats in a single layer on a baking sheet, freeze until solid, then transfer to a freezer bag. They can be kept for up to three months this way.
When it’s time to serve, simply take out the desired amount and let them thaw at room temperature. If your furry friend enjoys warm snacks, a quick zap in the microwave for about 10-15 seconds will do the trick. Just ensure they’re not too hot before offering them to your pup.

For a fun twist, you can layer them with a touch of peanut butter or yogurt in a bowl. It adds a bit of excitement and makes snack time even more enjoyable. Always keep an eye on portion sizes to maintain your pet’s health. A small piece as an occasional treat works wonders for their happiness!


