


For optimal results, set your dehydrator or oven to around 70°C (160°F) and allow the meat to dry for approximately 6 to 8 hours. The key is to ensure that the product is completely moisture-free to maintain quality and safety.
Before starting, slice the meat into uniform pieces, about 1/2 inch thick. This uniformity helps achieve even drying. After the drying cycle, check for a leathery texture; it should not feel sticky or moist. If your pieces are not adequately dried, return them to the heat for additional time, checking periodically.
Once completed, store these tasty morsels in an airtight container, preferably in a cool, dark place. This practice preserves freshness, allowing your furry friend to enjoy these homemade snacks for weeks. Always monitor for any signs of spoilage before serving. Enjoy treating your canine companion with these nutritious and delicious bites!
Timeframe for Drying Poultry Treats
For optimal results, set your dehydrator to 70°C (160°F) and maintain that temperature for approximately 6 to 8 hours. This duration ensures that all moisture is removed, creating a safe and tasty snack. Keep an eye on the pieces, as thinner slices will dry faster, while thicker portions may take a bit longer.
After about 6 hours, it’s wise to check the texture. The meat should be firm and pliable, not brittle. If you find it still feels a bit moist, continue the process, checking every 30 minutes until achieving the desired consistency.
Once the drying process is complete, allow the treats to cool completely before storing them in an airtight container. This helps maintain their freshness and prevents any moisture from spoiling your homemade goodies.
For safety, always ensure that the internal temperature of the meat reaches at least 75°C (165°F) before starting the drying process. This step is crucial for eliminating harmful bacteria, ensuring that the snacks are both delicious and safe for your furry friend.
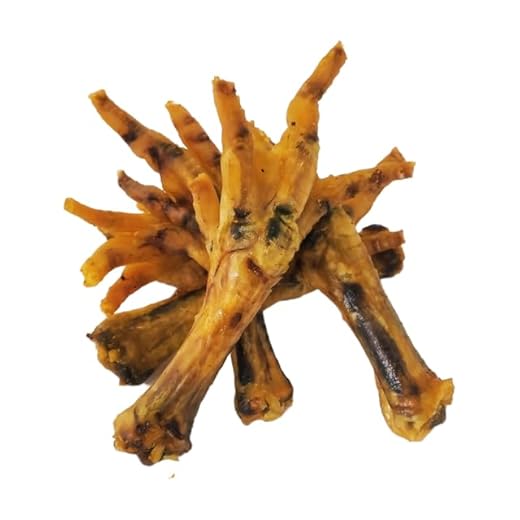
Choosing the Right Cuts for Dehydration
The best approach is to select lean cuts that are low in fat content. Fat doesn’t dry well and can lead to spoilage. Here are some recommended options:
- Chicken breast: This cut is lean and dries quickly, making it a favourite among pet owners.
- Thighs: Slightly richer in flavour, thighs can also be a good choice; just ensure to trim excess fat.
- Drumsticks: These provide a good amount of meat and can be dried effectively, but again, trim the fat before preparation.
It’s crucial to remove all skin and visible fat before starting the drying process. This not only helps with preservation but also enhances the texture and flavour for your pet. For the best results:
- Cut the meat into uniform pieces to ensure even drying.
- Use a sharp knife for clean cuts, reducing the risk of tearing the meat.
- Consider slicing against the grain for a more tender chew.
Always remember to wash your hands and utensils thoroughly after handling raw meat to prevent cross-contamination. Once you’ve chosen and prepared your cuts, you’re ready to move on to the drying process. Happy cooking!
Preparing Poultry for the Dehydration Process
Begin with selecting fresh, high-quality cuts. Breast fillets are ideal due to their low fat content, ensuring a lean treat. Trim away any visible fat and skin, as these can lead to spoilage during the drying process. Aim for uniform thickness, slicing each piece to about 1/4 inch. This thickness helps achieve even drying, preventing overcooked edges while keeping the centre moist.
Marinating Options
Consider marinating the strips for added flavour. Use dog-friendly ingredients such as low-sodium chicken broth or a mix of pumpkin puree and herbs like parsley. Avoid anything toxic to pets, such as garlic or onion. Let the pieces soak for at least an hour, allowing the flavours to infuse.
Prepping for Drying
Before placing the strips in the dehydrator, pat them dry with paper towels to remove excess moisture. This step is crucial for achieving the desired texture. Arrange the strips in a single layer on the dehydrator trays, ensuring they are not touching. Proper spacing allows air to circulate freely, promoting even drying.
Optimal Dehydration Time and Temperature Settings
Set your dehydrator to a temperature of 70°C (160°F) for optimal results. This temperature effectively eliminates harmful bacteria while preserving nutrients. For time, aim for approximately 6 to 8 hours, checking periodically for desired texture.
Factors like the thickness of the meat and the specific model of your dehydrator can influence drying time. Thinner slices will dry quicker, while thicker pieces may require additional time. Always ensure that the meat is completely dry and has a brittle texture before storing it.
Using a meat thermometer can help confirm that the internal temperature reached at least 74°C (165°F) during the initial cooking phase, ensuring safety before the drying process starts.
After drying, allow the treats to cool completely before sealing them in an airtight container to maintain freshness. Store in a cool, dark place for optimal shelf life, and enjoy watching your furry friend relish their homemade snacks!
Signs That Dehydrated Chicken is Ready for Dogs
Check for a firm texture and a slightly chewy consistency. The meat should not be brittle but rather hold its shape when handled. If it breaks apart easily, it may have been over-processed.
A rich, concentrated aroma indicates readiness. If the scent is faint or unnoticeable, it may need additional time in the dehydrator. The smell should be appetising, enticing your furry friend.
Look for a uniform colour throughout the strips. If there are any spots that appear moist or discoloured, those areas might not be fully dried. Consistency in colour signifies even moisture removal.
Consider conducting a simple snap test. Bend a piece of the meat; if it bends without breaking, it’s a sign that it’s adequately dried. A piece that snaps indicates it might be overdone.
Once you’re satisfied with the texture and aroma, allow the pieces to cool before storing. This helps in retaining their quality and prevents moisture from getting trapped in the container.
For more insights on quality dog food options, visit who makes tails com dog food.
Storing Dehydrated Treats Safely and Effectively
Keep your prepared snacks in an airtight container to maintain freshness. Glass jars or vacuum-sealed bags work wonders for preserving flavour and preventing moisture. Store them in a cool, dark place, away from direct sunlight, to extend their shelf life. If you prefer, refrigeration is an option, but ensure your containers are well-sealed to avoid freezer burn.
Storage Duration
These treats can last several months if stored correctly. Check them periodically for any signs of spoilage or changes in texture. If they feel soft or have developed an off smell, it’s best to discard them.
Labeling and Organisation
Label your containers with the date of preparation and the type of treat. This simple step helps track freshness and ensures you use the oldest snacks first. Organise them in your pantry or fridge, so they’re easily accessible during treat time.
| Storage Method | Duration | Notes |
|---|---|---|
| Airtight Container (Room Temperature) | 1-3 months | Keep in a cool, dark area. |
| Vacuum-Sealed Bags | 4-6 months | Remove as much air as possible. |
| Refrigerator | 3-6 months | Ensure containers are airtight. |
| Freezer | 6-12 months | Ideal for long-term storage. |
By following these guidelines, you can ensure your homemade treats stay delicious and safe for your furry friend to enjoy!


