


Begin by laying the gear flat on the ground, ensuring that the straps are untangled and ready for use. This approach simplifies the process and allows for a clearer view of how the straps align with your furry friend’s body.
Next, encourage your pet to step into the loop designed for their front legs. This step is crucial as it positions the equipment correctly. Gently lift the straps over their back, ensuring that the padded part rests comfortably against their body. It’s important to avoid any twisting in the material to prevent discomfort.
Once the straps are in place, adjust the fit by pulling the excess material through the sliders. Aim for a snug fit; you should be able to slide two fingers between the gear and your pet’s skin. Too loose, and it could slip off; too tight, and it may cause chafing. Your companion’s comfort should always be the priority.

Finally, secure the clasps and give the straps a gentle tug to ensure everything is fastened correctly. Take a moment to observe your pet’s movements. They should be able to walk, run, and play without any hindrance. If they seem uncomfortable, don’t hesitate to readjust the fit.
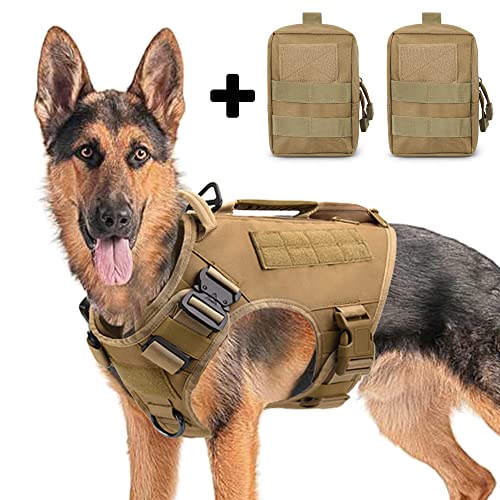
Steps for Fitting a Rabbitgoo Canine Vest
Begin by laying the vest flat. Ensure the straps are untangled and the adjusters are accessible. Place the vest on the ground, with the back panel facing up.
Guide your pet’s front legs through the designated openings. Make sure the vest sits comfortably around their chest and belly. Adjust the straps so they are not too tight, yet secure enough to prevent slipping.
Fasten the clips at the back and on the belly. Check that the fit allows for a slight amount of movement without being restrictive. The vest should rest snugly, ensuring your furry friend can move without discomfort.
After securing everything, take a moment to observe your pet’s behaviour. If they seem uneasy, readjust the straps for better comfort. A proper fit will enhance their walking experience.
Lastly, take your pup for a short walk to test the fit. Keep an eye on how they move. If any adjustments are needed, don’t hesitate to tweak the straps for the best comfort and support.
Choosing the Right Size for Your Canine Companion
Start with accurate measurements of your pet’s girth and neck. Use a soft measuring tape to determine the circumference around the widest part of the chest, typically just behind the front legs. For the neck, measure around the base where the collar sits. Add a couple of centimetres for comfort, but avoid excessive slack.
Size Charts and Adjustments
Refer to the manufacturer’s size chart, which usually categorises sizes based on weight and measurements. If your furry friend falls between sizes, opt for the larger option to ensure a secure yet comfortable fit. Remember, adjustability is key. Most models include straps that allow fine-tuning for a snug fit without restriction.
Testing the Fit
After securing the gear on your pet, conduct a quick fit test. You should be able to fit two fingers between the material and your pet’s skin. If it’s too tight, loosen the straps; if too loose, adjust accordingly. Observing your pet’s comfort during movement is crucial. A well-fitted item should allow freedom while preventing slipping off.
For additional tips on training and comfort adjustments, check out how to change bridport dog training society group to page.
Adjusting the Harness for a Comfortable Fit
First, ensure your pet is standing or sitting calmly. This makes it easier to adjust the straps accurately. The fit should be snug but not constricting. Use two fingers to gauge the space between the material and your pet’s body; it should allow for some movement but not slide around.
Strap Adjustments
Start with the chest strap. It should sit low on the chest to distribute pressure evenly. Adjust the side straps to achieve this, ensuring they are symmetrical on both sides. If your companion has a broad chest, consider loosening the straps slightly, while for a slimmer build, tighten them for a better fit.
Final Checks
After adjustments, take your furry friend for a short walk. Observe their movement; they should not show signs of discomfort or restrict their natural gait. If you notice any rubbing or chafing, revisit the adjustments. A well-fitted restraint will enhance comfort and safety during outings.
Securing the Harness Properly
To ensure your pet is safe and comfortable, double-check the attachment points after fitting. Here are steps to secure everything effectively:
- After adjusting the straps, tug gently on the body of the gear. It should feel snug without restricting movement.
- Fasten all clips and buckles, ensuring they click into place. A loose clip can lead to escape or discomfort.
- Check for any twists in the straps. Twisted straps can create pressure points and cause irritation.
Final Checks
Before heading out, perform a few final checks:
- Run your fingers between the straps and your pet’s skin. There should be enough space to fit two fingers comfortably.
- Observe your companion’s reaction. If they seem anxious or attempt to remove the gear, reconsider the fit.
- Give a gentle pull on the lead while your pet is standing. The connection should feel secure and stable.
Post-Walk Inspection
After each outing, inspect the equipment for wear and tear. Look for frayed edges or loose stitching, as these can compromise safety. Regular maintenance ensures your furry friend stays secure on every adventure.
Training Your Canine to Wear the Gear
Introduce the gear gradually. Start by letting your furry friend sniff it and explore it at their own pace. This builds curiosity and reduces anxiety associated with new objects.
Use positive reinforcement. Each time your companion interacts with the gear, reward them with treats or praise. This creates a positive association, making them more receptive to wearing it.
Begin with short sessions. Slip it on for just a few minutes initially, gradually increasing the duration as your pet becomes comfortable. Monitor their behaviour closely; if they seem distressed, take a step back.
Incorporate playtime while wearing the gear. Engage your four-legged friend in their favourite activities, like fetching or walking, while they’re wearing it. This helps them associate the gear with fun and excitement.
Practice in a familiar environment. Start training indoors or in your garden, where your pet feels safe. Once they’re comfortable, transition to walks in different settings.
Be patient and consistent. Some dogs may take longer to adjust than others. Consistency in your approach will help reinforce the behaviour you want to see.
Continue using the gear regularly. Make it a part of your routine, so your canine learns that it’s a normal aspect of their daily life.


