


Begin by ensuring the gear is properly adjusted. Measure around the chest and neck of your furry friend to guarantee a snug fit without causing any discomfort. A well-fitted device prevents any unwanted slipping and ensures safety during outings.
Next, introduce the gear gradually. Allow your four-legged companion to sniff and explore it before attempting to secure it on them. This familiarity can ease any apprehension and create a more positive association with the new accessory. Patience is key; don’t rush the process.
Once they seem comfortable, gently slip the device over their head or adjust the straps, depending on the design. Keep the mood light and engaging. Use treats and praise to reinforce the experience. This association with positive reinforcement can significantly reduce any anxiety related to wearing the gear.

Check for any irritation or signs of discomfort after the first few uses. Adjust the fit as necessary to ensure that it remains a pleasant experience. A well-worn accessory can make outings enjoyable for both of you, transforming routine strolls into cherished moments of connection.
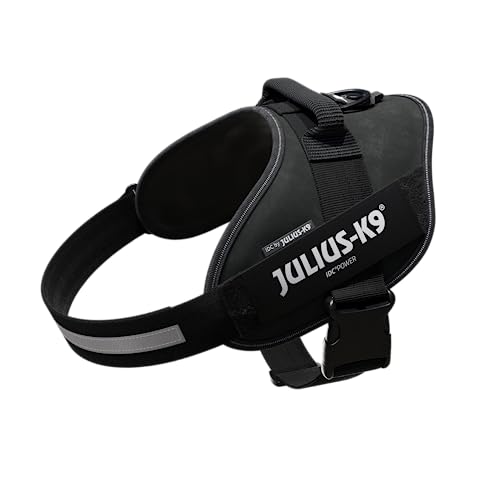
Steps for Fitting a Canine Companion’s Love Gear
Begin by laying the device flat on the ground, ensuring all straps are untangled. Next, identify the front section, which usually has a distinct design or logo. Place this area over the chest area of your furry friend. It should fit snugly without restricting movement.
Adjusting the Straps
After positioning the gear, gently pull the straps around the torso. Make sure they are not too tight. A good rule is to ensure you can fit two fingers between the strap and the fur. Secure the clasps, ensuring they click into place. Check for any excess strap length and trim if necessary to prevent snagging.
Final Checks
Once everything is fastened, allow your four-legged friend to move around a bit. Watch for any signs of discomfort or restriction. If they seem hesitant, adjust the fit again. The goal is comfort and security, allowing for fun outings together.
Selecting the Right Size for Your Canine Companion
Choosing the correct dimensions for this type of gear is crucial for comfort and safety. Always refer to the manufacturer’s sizing chart, which usually includes measurements for chest girth and neck circumference.
Measuring Techniques
- Chest Girth: Use a flexible measuring tape around the widest part of the chest, just behind the front legs. Make sure it’s snug but not tight.
- Neck Circumference: Measure around the base of the neck, where the collar typically sits. Again, ensure a snug fit.
- Back Length (if applicable): For some styles, measure from the base of the neck to the base of the tail to determine the ideal length.
Always round up to the nearest size if measurements fall between two sizes; a little extra room can make a significant difference in comfort.
Adjustability Matters
Consider options with adjustable straps. This feature allows for a more custom fit, accommodating changes in weight or coat thickness throughout the year.
Remember, a well-fitted accessory prevents chafing and enhances the overall experience for both of you. If it’s too tight, it can cause discomfort; too loose, and it might slip off or lead to an escape.
In my experience, I once underestimated sizing and ended up with a piece that was slightly too large. It slipped off during a walk, leading to a little chase. Since then, I’ve always double-checked measurements!
Steps to Properly Fit the Harness
First, adjust all straps before placing it on the canine. Begin by loosening the straps to ensure a comfortable fit. This prevents any stress or discomfort during the fitting process.
1. Positioning
Gently guide the apparatus over the animal’s head, ensuring the back piece rests along the spine. The chest strap should lay snugly against the front of the torso. Make sure the device is not twisted; this can lead to discomfort or chafing.
2. Securing the Straps
Once positioned, tighten the straps gradually. Aim for a secure fit that allows two fingers to fit comfortably between the straps and the skin. This ensures enough room for movement while preventing any escape. Test the fit by gently pulling on the harness; it should remain in place without sliding or shifting.
After adjusting, take a moment to observe your furry friend’s movement. A well-fitted apparatus should not restrict their natural gait. Allow them to walk around a bit; observe for any signs of discomfort or irritation.
Adjusting the Harness for Comfort and Security
Begin by ensuring the fit is snug but not restrictive. You should be able to slide two fingers between the material and the coat. This guarantees comfort while preventing any escape attempts.
Check the straps for proper positioning. The chest strap should rest low on the sternum, while the back strap should sit just behind the shoulder blades. This alignment allows for freedom of movement and reduces the risk of chafing.
If your companion shows signs of discomfort, such as pulling or trying to wriggle free, readjust the harness. Tightening or loosening the straps slightly can make a significant difference in their experience.
Regularly inspect the harness for wear and tear. Frayed edges or damaged buckles can compromise safety. Replace any worn components to ensure secure outings.
For those moments when your furry friend needs extra motivation, consider pairing walks with high-quality treats. You might want to explore the best dog food for bluetick coonhound to keep their energy up and spirits high during your adventures together.
Always remember to reward good behaviour while adjusting the harness. Positive reinforcement helps them associate the process with pleasant experiences, making future fittings smoother.
Tips for Encouraging Acceptance of the Harness
Introduce the equipment gradually. Let your furry friend sniff and explore it before attempting to wear it. This builds familiarity and reduces anxiety.
Pair the harness with positive experiences. Use treats or favourite toys to create a positive association. Show it to them during playtime or feeding sessions.
Start by placing the harness on them for short periods. Begin with just a few minutes and gradually increase the time as they become more comfortable.
Use praise and rewards when they accept the fitting. Celebrate small victories; this reinforces their willingness to wear the gear.
Practice in a relaxed environment. Choose a quiet space free from distractions for the initial tries. This helps them focus and feel secure.
Observe their body language. Signs of discomfort like tensing or trying to remove it indicate the need for adjustments or a break.
Incorporate it into daily routines. Wear the gear during fun activities like playtime or light exercise. This normalises the experience and integrates it into their life.
Be patient. Every companion adjusts at their own pace. Consistency and gentle encouragement will yield results over time.


