
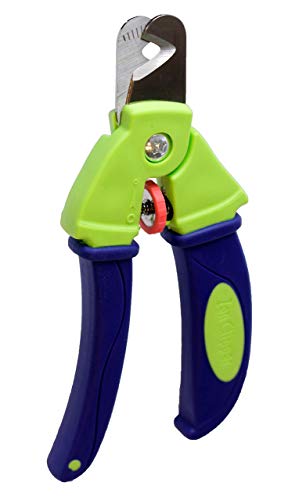


Begin with a sturdy, high-quality clipper designed specifically for animal claws. This tool will make the process smoother and safer for both you and your furry friend. I found that using a guillotine-style clipper works wonders for larger breeds, while a scissor-type is perfect for smaller ones.
Before you start, ensure your pet is relaxed. A calm environment is key. I often play some soothing music and give my pup a few treats to create a positive association. If your canine companion is anxious, consider enlisting the help of a friend to hold them gently but securely.
Identify the quick–the sensitive part within the claw that contains blood vessels and nerves. Avoid cutting into this area to prevent pain and bleeding. For lighter-coloured tips, the quick is usually visible, appearing as a pink line. For darker ones, trimming small sections at a time is wise until you see a darker core, indicating you’re nearing the quick.

If you accidentally cut too far and cause bleeding, don’t panic. A styptic powder or cornstarch can stop the bleeding quickly. After any mishaps, I always reward my pup with a treat and plenty of praise to keep their experience positive.
Regular maintenance is essential. I make it a point to check my dog’s claws every couple of weeks and schedule trimming every month. This not only promotes comfort but also prevents potential injury to both the pet and your home.
Trimming Overgrown Canine Claws
Using a guillotine-style clipper can be a game-changer for managing those oversized claws. Ensure the cutting edge is sharp for a clean cut, which reduces the risk of splitting and discomfort. Hold your pet’s paw firmly but gently, and position the clipper at a slight angle to the tip of the claw.
Before starting, take a moment to familiarise your furry friend with the clippers. Let them sniff and explore the tool. This can ease their anxiety and create a more relaxed atmosphere. It’s often beneficial to engage in a short play session to help them feel comfortable.
Begin with small sections. Don’t rush; take your time to avoid hitting the quick, which is the sensitive part containing blood vessels and nerves. If your companion has dark claws, identifying the quick can be challenging. Look for a darker section towards the base; that’s where you should stop cutting. If you accidentally cut too deep, keep styptic powder on hand to stop any bleeding.
Reward your pet after each paw is done. Positive reinforcement helps them associate the process with a pleasant experience. Treats or praise can work wonders to maintain a calm demeanour throughout.
If your companion is particularly anxious, consider breaking the task into multiple sessions. A few minutes at a time can prevent stress for both of you. Always monitor their reaction and adjust your approach as necessary.
Keeping a regular schedule is key. Establishing a routine can help prevent overgrowth and make each session easier. Aim for every 4-6 weeks, and your furry companion will thank you for it with their comfort and mobility.
Assessing Your Pet’s Claw Length and Health
Regularly check the length of your companion’s claws by observing their walking and playing habits. Ideally, they should not touch the ground while your furry friend is standing. If you notice any discomfort or if the claws are curling or cracking, it’s a signal to take action.
Look for signs of distress. If your pet is reluctant to walk on hard surfaces or appears to be limping, this could indicate that their claws are too long. Additionally, inspect the colour of the claws; a healthy claw should have a smooth surface without any discolouration or brittleness.
Check the quick, which is the pinkish area within the claw. If this part is exposed or close to the tip, it’s a sign that the claw has grown excessively. For lighter-coloured claws, the quick is more visible, making it easier to gauge the ideal length. For darker claws, be extra cautious, as the quick is harder to see.
Regular grooming is beneficial. I’ve noticed that consistent care helps keep my pet’s claws at a manageable length. After each outing, I take a moment to assess whether they’ve grown too much. The more frequently this is done, the easier it becomes to maintain a healthy length.
Involve your pet in the process. Make it a routine to check their paws during playtime. This not only familiarises them with handling but also allows you to keep an eye on their claw health without stress.
Pay attention to any unusual behaviours. If your furry friend is scratching furniture or the floor more than usual, it might be their way of coping with discomfort from overgrown claws. Addressing this issue promptly can prevent further complications.
Selecting the Right Tools for Nail Grooming
Choosing the appropriate instruments can make the process smoother and more effective. Here’s a quick guide to help you pick the best tools for your pooch’s grooming session.
Types of Tools
- Clippers: Look for high-quality clippers designed for large breeds if your furry friend has thick, tough tips. Scissor-type clippers are great for precision, while guillotine-style ones offer easy handling.
- Grinders: A rotary grinder can be a fantastic alternative, especially for fearful pups. It smooths the edges and reduces the chances of cutting too close. Make sure to use it gently to avoid discomfort.
- Files: After using clippers or grinders, a nail file can help achieve a smooth finish. Choose a gentle option to prevent irritation.
Additional Accessories
- Styptic Powder: Always keep this on hand. In case you accidentally cut too deep, it will help stop any bleeding quickly.
- Treats: Positive reinforcement is key. Having some tasty rewards nearby can make the experience more pleasant for both of you.
Don’t forget to consider your pet’s individual needs. If they have specific dietary concerns, you might want to check out the best food to feed dogs with epi. Keeping them healthy can ensure a calmer grooming session!
Step-by-Step Guide to Safely Trim Pooch Claws
Begin with your furry friend in a calm environment. Choose a quiet space where distractions are minimal. This helps your pet to relax and feel secure.
Hold your companion’s paw gently but firmly. It’s essential to be confident; this reassures your pet. If they seem anxious, take a moment to pet them and speak softly. Building trust is key.
Identify the proper area to focus on. Look for the quick–a pinkish section inside the claw. Avoid cutting into it to prevent pain and bleeding. If your pet has dark claws, use a flashlight to inspect closely.
Gradually clip small sections of the tip. Start with just a tiny piece to gauge your pet’s reaction. If they remain calm, continue with incremental cuts. It’s better to make several small snips than to risk cutting too much at once.
If you notice any hesitation or signs of discomfort, pause. Allow your furry friend to take a break before continuing. Positive reinforcement, like treats or praise, can help create a pleasant experience.
In case of accidental injury, have styptic powder handy. This can quickly stop any bleeding. Apply it directly to the affected area and ensure your pet is comfortable.
After finishing, reward your companion with affection or a favourite snack. This reinforces that the experience was positive, making future sessions easier.
| Step | Action | Tip |
|---|---|---|
| 1 | Calm environment | Choose a quiet room |
| 2 | Hold paw gently | Be confident and soothing |
| 3 | Identify the quick | Use a flashlight for dark claws |
| 4 | Clip small sections | Start with tiny tips |
| 5 | Take breaks if needed | Use treats for encouragement |
| 6 | Use styptic powder if needed | Apply directly to bleeding area |
| 7 | Reward after | Use praise or favourite treats |
With patience and practice, this task can become a smooth part of your routine. Make it enjoyable for both of you, and it will become less of a chore over time.
Post-Trimming Care and Maintenance for Canine Claws
After clipping, ensure the paws are clean and dry. This helps prevent any irritation or infections. Gently wipe the pads with a damp cloth to remove any debris. If your furry friend seems uncomfortable, a soothing paw balm can provide relief and hydration.
Monitoring for Any Issues
Keep an eye on the paw areas for a few days following the procedure. Look for signs of redness, swelling, or bleeding. If any of these occur, consult a veterinarian. It’s wise to check the quick regularly, especially if your companion is active outdoors.
Establishing a Regular Routine
Consistency is key. Aim for regular maintenance every few weeks, depending on how quickly the claws grow. Incorporate this into your grooming schedule to keep everything manageable. Consider rewarding your furry pal with treats or playtime to make the experience positive.
Incorporating activities that wear down their claws naturally, like walks on rough surfaces or playing on concrete, can help maintain their length between grooming sessions. Just be cautious of overexertion or injury!


