


When considering the placement of a microchip in your canine companion, the recommended location is between the shoulder blades, just under the skin. This specific area ensures that the chip remains secure and is easy for scanners to detect. During the procedure, a professional will use a sterile needle to insert the tiny device, which is roughly the size of a grain of rice. The process is quick and generally causes minimal discomfort.
Having experienced this with my own furry friend, I can assure you that the implantation is a straightforward process. My vet completed it in a matter of seconds, and my pup barely flinched. It’s crucial to have the chip registered with your contact information, as this greatly increases the chances of a happy reunion should your pet wander off.
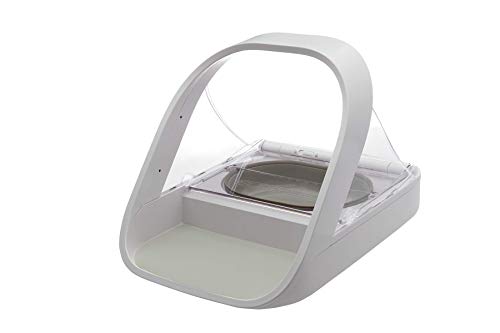
Regular check-ups are a good idea to ensure the chip is still functioning correctly and hasn’t moved from its original position. Many clinics offer scanning services during routine visits, providing peace of mind. It’s a simple yet effective way to enhance your pet’s safety without compromising their comfort.
Common Injection Sites for Microchips in Canines
Microchips are typically injected between the shoulder blades, specifically in the subcutaneous tissue. This location is chosen for its ease of access and minimal discomfort during the procedure. The chip is inserted using a special needle, which ensures that it is placed securely beneath the skin.
Another common area is the left side of the neck, just above the shoulder. This site is also convenient for implantation and allows for easy scanning. The procedure is quick, and most canines tolerate it well, often requiring only a brief moment of restraint.
In some instances, the microchip may be positioned along the back or side of the body, depending on the veterinarian’s preference and the animal’s specific anatomy. Regardless of the location, the goal remains the same: to ensure that the chip is safely embedded and can be easily detected when scanned.
After the microchip is implanted, it’s important to monitor the area for any signs of irritation or infection. While complications are rare, keeping an eye on the injection site ensures the comfort and well-being of your furry companion.
Impact of Placement Location on Microchip Scanning
For optimal scanning results, the microchip should be implanted between the shoulder blades, as this area is the most common and effective for detection. Proper positioning enhances the likelihood of successful reads with standard scanners, which typically target this region.
Factors Influencing Scan Success
- Depth of Insertion: If the microchip is too deep or too superficial, it may hinder the scanner’s ability to read it effectively.
- Positioning: Scanners are designed to read chips placed in specific orientations. If the chip shifts, it might lead to unsuccessful scans.
- Surrounding Tissue: The amount of fatty tissue or muscle surrounding the microchip can affect signal transmission, impacting scan reliability.
Recommendations for Optimal Placement
- Always consult with a qualified professional who is experienced in microchip implantation.
- Ensure the procedure is done in a sterile environment to avoid complications.
- After implantation, regularly check the microchip’s functionality with a compatible scanner.
Regular visits to a veterinary clinic can help ensure that the microchip remains functional and easy to scan, offering peace of mind for pet owners. Always keep an eye on the placement area for any signs of irritation or discomfort, which could indicate that the microchip has migrated or become less effective.
Factors influencing the choice of microchip insertion site
Choosing the right spot for microchip installation is influenced by several key factors. The anatomy of the animal plays a significant role; areas with thicker skin and more muscle, like the scruff of the neck, are preferred. This not only ensures the microchip is securely embedded but also reduces discomfort during the procedure.
Another important aspect is the age and size of the animal. For smaller breeds, alternative sites may be considered to avoid complications. Additionally, the microchip’s design and size can impact the choice of location. Some chips are bulkier and may require deeper insertion or a different angle to ensure optimal placement.
Environmental considerations also come into play. If an animal frequently visits areas where skin abrasions are likely, such as dog parks, a location that minimizes exposure to trauma is advisable. This prevents potential migration of the chip or damage to the surrounding tissue.
Aftercare is another factor; the chosen site should allow for easy monitoring post-procedure. A location that is less prone to irritation or infection is ideal, particularly if the animal has a history of skin issues. Regular check-ups can also help ensure the microchip remains in place and functions correctly.
Lastly, the overall health of the animal can influence the decision. If an animal is undergoing other procedures or has health concerns, this may affect the microchip placement strategy. Consulting with a knowledgeable professional ensures that the most suitable site is selected. For those caring for nursing mothers, ensuring their nutrition is optimal can also support their overall health; consider looking into the best dry dog food for nursing mothers.
Aftercare and monitoring at the microchip site
After the microchip has been inserted, it’s crucial to keep a close eye on the area. Look for any signs of swelling, redness, or discharge. These could indicate an infection or an adverse reaction. If you notice any of these symptoms, consult your local animal healthcare provider promptly.
Cleaning and Care
For the first few days following the procedure, it’s advisable to avoid bathing your pet. Water and soap can irritate the injection site. Instead, use a damp cloth to clean around the area if necessary. If your furry friend is particularly active, consider limiting strenuous activity for a week to allow the tissue to heal properly.
Monitoring Behaviour
Watch for any changes in your companion’s behaviour after the microchip insertion. If they appear more lethargic than usual or show signs of discomfort, such as whining or avoiding touch around the area, reach out to a healthcare professional. A quick check can help ensure everything is on track.
Maintaining a record of the microchip number and any related documents will also aid in future identification or registration updates. Regular check-ups can help ensure the microchip remains functional and that your pet continues to be safe and accounted for.


